Types of Oats for the Best Oat Milk
Choosing the right type of oats is crucial for making quality homemade oat milk. Here are the best options:
Rolled Oats/Flakes (Recommended Option):
These are the best choice for making oat milk due to their structure and composition. Their flattened shape allows for better nutrient extraction and flavor during the process.
- Easier processing in the blender, allowing better nutrient extraction and a more uniform texture
- Shorter soaking time (30 minutes minimum), ideal for quick preparations without compromising final quality
- Creamier and smoother texture, perfect for use in coffee and hot beverages without separating
- Better final flavor, naturally sweeter as starches are released in a controlled manner
Whole Grain Oats:
- Higher nutritional content, especially in fiber and protein due to the intact grain
- Requires extended soaking (8 hours minimum), necessary to soften the grain and aid digestion
- Denser texture, resulting in milk with more body but less creaminess
- More laborious process, requires longer blending time and may need double filtering
Types to Avoid
- Instant or pre-cooked oats, as they produce slimy milk with an unpleasant texture
- Flavored oats, as they contain added sugars that alter the natural milk flavor
- Oats with additives, as they may contain preservatives and thickeners that affect the final quality
For the best oat milk, it's essential to choose unprocessed whole rolled oats, preferably organic, as they offer better flavor and nutritional quality. When purchasing, always check the expiration date, ensure the flakes are fresh, and verify that the package shows no signs of moisture, which could affect your milk's final quality.

Key Ingredients for Oat Milk
- Rolled oats: 1 cup - Provides creamy texture and characteristic flavor
- Filtered water: 4 cups - Extracts nutrients and creates the liquid base
Optional:
- Dates or maple syrup: 1-2 pieces or 1 tablespoon - Adds natural unrefined sweetness
- Pinch of salt: 1/8 teaspoon - Enhances the natural oat flavors
- Vanilla extract: 1 teaspoon - Adds an aromatic and sweet touch
- Ground cinnamon: 1/4 teaspoon - Complements the flavor and adds warmth
The basic ratio is 1:4 (oats:water) for ideal consistency. This ratio can be adjusted depending on whether you prefer a creamier or lighter milk.

How to Make Oat Milk, Step by Step
Homemade oat milk is a healthy and economical alternative to commercial versions. With simple ingredients and the correct method, you can prepare a creamy and versatile drink perfect for multiple uses.
1. Prepare the Ingredients
- Gather all necessary ingredients and ensure you have a clean and organized workspace for efficient preparation.
- Verify that the oats are fresh and unprocessed, avoiding any instant or pre-cooked oats.
- Use cold filtered water to ensure a clean taste and prevent premature starch activation.
- The base ratio is 1 cup of oats to 4 cups of filtered water, adjustable according to desired consistency.
2. Soak the Oats
- Place the oats in a large bowl and cover completely with cold water, ensuring all flakes are submerged.
- Let the oats rest for 30 minutes, which will soften the grains and facilitate the blending process.
- This step is crucial for improving digestibility and maximizing nutrient extraction.
3. Drain and Rinse
- Drain the soaking water completely using a fine strainer, making sure to remove all liquid.
- Rinse the oats under cold running water until the water runs clear, removing excess starch.
- This process is essential to prevent the milk from having a slimy or too thick texture.
4. Blend the Ingredients
- Place the soaked oats in the blender with 4 cups of freshly measured cold filtered water.
- Add optional ingredients: 1-2 dates or 1 tablespoon maple syrup for natural sweetness.
- Add 1/4 teaspoon salt to enhance flavors, 1 teaspoon vanilla extract, and 1/4 teaspoon ground cinnamon if desired.
- Process the mixture for exactly 30-45 seconds, no more, to avoid excessive starch activation.
5. Strain the Mixture
- Carefully pour the mixture through a nut milk bag or very fine mesh strainer.
- Avoid pressing or squeezing the residue too hard to maintain a smooth texture and prevent sliminess.
- If you want an extra fine texture, perform a second straining with a clean strainer or new bag.
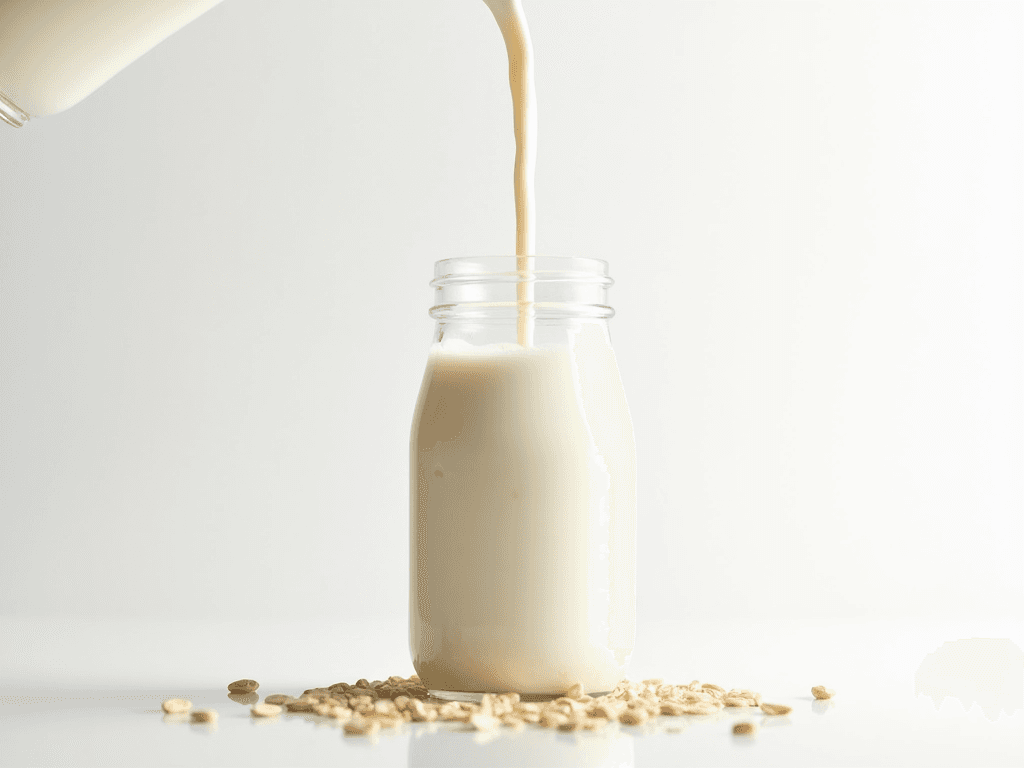
6. Store
- Immediately transfer the filtered milk to a clean glass jar with an airtight lid.
- Place the container in the coldest part of the refrigerator, ideally between 2°C and 5°C.
- The milk will keep well for 4-5 days if stored properly.
- Shake the container well before each use to reincorporate any separated ingredients.
7. Use the Leftover Pulp
- Store the resulting pulp in an airtight container in the refrigerator for later use.
- Use these nutritious leftovers in smoothies, baking batters, or as a base for other preparations.
- The pulp will keep well for 2-3 days if refrigerated properly.
With this recipe, you'll get creamy and delicious oat milk, perfect for use in coffee, cereals, or any other preparation. Remember that texture and taste can be adjusted according to your preferences by modifying the amount of water or optional ingredients.

Different Filtering Methods for Better Texture
Filtering is one of the most important steps in preparing oat milk, as it determines the final texture and prevents it from becoming slimy. Choosing the right method can make a significant difference in the result.
Nut Milk Bag or Plant Milk Filter
- Most recommended method for its effectiveness, providing the cleanest results while being durable and reusable over time.
- Allows better liquid extraction while maintaining complete control over the straining pressure.
- Efficiently retains oat residue while allowing a smooth flow of liquid through its fine mesh material.
- Easy to wash and reuse, making it an economical and environmentally friendly choice for regular oat milk making.
Fine Mesh Strainer
- Ideal for initial filtering and perfect for those just starting to make oat milk at home.
- More accessible and common in households, usually available in most kitchen cabinets.
- Can use a wooden spoon to help press gently against the sides for better extraction.
Chinese Strainer
- Comes with a pestle that helps pressing while maintaining control over the pressure applied.
- Allows more liquid extraction from the pulp while keeping a professional-grade filtering process.
- Ideal for larger quantities, perfect for batch preparation of oat milk.
Cheesecloth or Muslin
- Economical and versatile option that can be cut to size for different batch amounts.
- Must be fine-weaved to ensure proper filtration and prevent oat particles from passing through.
- Requires double filtering for best results, but provides excellent control over the final texture.
Tips for Better Filtering
- Perform double filtering for a finer texture, using clean equipment for each pass.
- Don't press the pulp too hard to avoid slimy milk, letting gravity do most of the work.
- Use cold water during the process to prevent starch activation and maintain optimal texture.
- Keep utensils clean for best results and to maintain proper hygiene standards.
Remember that patience is key during the filtering process, as rushed filtering can compromise the final quality of your oat milk. Investing in a good filtering method is worth it to achieve professional results.

Tips for Making Creamier and Less Slimy Oat Milk
Texture is one of the biggest challenges when making homemade oat milk. With these practical tips, you can achieve creamy milk and avoid that concerning slimy texture.
Use Very Cold Water
The cold water prevents oat starches from activating too much during the blending process. You can even add a couple of ice cubes during mixing to keep the temperature low.
- Control Blending Time: Don't blend for more than 30-45 seconds. Excessive blending time can overheat the mixture and activate too many starches, resulting in a slimy texture.
- Filter Correctly: Use a fine strainer or nut milk bag, and don't press the pulp too hard when straining. Excessive pressure can cause more starches to pass into your milk.
- Avoid Instant Oats: Always use traditional rolled oats, as instant or pre-cooked oats can result in a slimier texture due to their previous processing.
- Soak and Rinse: Soak the oats for 30 minutes and rinse them well before processing. This removes excess starch and significantly improves the final texture.
- Add Stabilizing Ingredients: A pinch of salt and a teaspoon of neutral oil (like sunflower) can help improve texture and prevent separation.
You might need a few attempts to find the perfect balance between creaminess and texture. Patience and attention to these details will help you achieve perfect oat milk.

Different Ways to Naturally Sweeten Oat Milk
To improve the taste of your oat milk naturally and healthily, here are the best options:
Basic Natural Sweeteners
- Pitted dates (1-2 pieces per liter): Provide natural sweetness and minerals, especially calcium
- Agave syrup: Twice as sweet as sugar, ideal for cold beverages
- Honey: Adds sweetness and antibacterial properties
- Natural stevia: Perfect for diabetics, use 5-6 drops per liter
Natural Spices
- Cinnamon: One teaspoon improves flavor and adds natural sweetness
- Vanilla: A touch of natural extract enhances sweet flavor
- Ginger: Adds a sweet and spicy touch
Natural Fruits
- Ripe banana: Adds creaminess and natural sweetness
- Dried figs: Sweeten naturally
- Raisins: Add concentrated sweetness
Usage Tips
- Add sweeteners during preparation within the filter
- Adjust quantities gradually according to taste
- For more versatility, sweeten at the time of consumption

Culinary Uses of Oat Milk
Oat milk is extremely versatile in the kitchen. Here are the most popular and effective uses:
In Hot Beverages
- Perfect for coffee and lattes due to its creamy texture, especially for its ability to foam and maintain consistency when heated.
- Ideal for hot chocolate and chai tea, as its natural sweetness perfectly complements these drinks without the need for additional sweeteners.
- Excellent for matcha and other specialty drinks, providing a mild flavor that doesn't compete with the main ingredients.
In Breakfasts
- Base for oatmeal and cereals, providing a natural and creamy flavor that enhances the texture of any hot or cold cereal.
- Perfect for shakes and smoothies, creating a creamy base that easily blends with fruits and other ingredients.
- Ideal for pancakes and waffles, providing a fluffy texture and slightly sweet flavor to the batters.
In Baking
- Perfect for cakes and muffins, providing moisture and a mild flavor that enhances any baked recipe.
- Ideal for creams and puddings, creating smooth and creamy desserts without pronounced dairy flavors.
- Excellent for homemade ice cream, providing a creamy base that doesn't form ice crystals.
In Savory Dishes
- Base for bechamel sauces, creating a silky texture and neutral flavor perfect for gratins.
- Perfect for mashed potatoes, adding creaminess without adding strong flavors that compete with the dish.
- Excellent for pasta sauces, creating healthy alternatives to traditional cream sauces.
The versatility of oat milk makes it an essential ingredient in modern cooking, especially for those seeking healthy and sustainable dairy alternatives. Its neutral flavor and creamy texture make it perfect for any recipe.

How to Properly Store Homemade Oat Milk
The proper storage of homemade oat milk is essential to maintain its freshness and nutritional properties. Here are the most important aspects:
Ideal Temperature
- Always keep refrigerated between 2°C and 5°C
- At 0-2°C: lasts 8-10 days
- At 3-4°C: lasts 5-8 days
- At 5-8°C: lasts 3-5 days
Proper Container
- Use glass jars with airtight lids
- Recommended option: divide into small portions
- Avoid plastic containers
- Always keep tightly sealed
Important Tips
- Don't leave at room temperature
- Shake before using
- Layer separation is normal
- Ideally consume within 3-5 days
Freezing
- Only recommended for making ice cream
- Once thawed will only last 1-2 days
- Not recommended for regular consumption
Following these storage guidelines will help you maintain the quality and safety of your homemade oat milk, ensuring you can enjoy its fresh taste and nutritional benefits for as long as possible.

Frequently Asked Questions (FAQs)
Q: How long does homemade oat milk last?
A: Homemade oat milk lasts between 3-5 days when refrigerated in an airtight glass container. Since it contains no preservatives, it's important to consume it as soon as possible and maintain the cold chain.
Q: Why does my oat milk turn out slimy?
A: The slimy texture can appear for three main reasons: blending the mixture for too long, using instant or pre-cooked oats, or pressing the pulp too hard when filtering. To avoid this, only blend for 30-45 seconds and use traditional rolled oats.
Q: Can I heat oat milk?
A: Yes, you can heat oat milk, but it's better to consume it cold or at room temperature. When heated, it can thicken due to the oat starches. If you need to use it hot, do so over low heat and without bringing it to a boil.
Q: Is it necessary to soak the oats before making milk?
A: While not strictly necessary, it's recommended to soak the oats for at least 30 minutes (for rolled oats) or 8 hours (for whole grain oats). Soaking aids digestion, improves nutrient extraction, and helps achieve a creamier texture.