The Simple Magic of Roasted Cauliflower
There's a certain kind of magic that happens when you roast cauliflower. This humble vegetable, often overlooked, transforms in the heat of the oven into something truly special: comforting, deeply flavorful, and undeniably crowd-pleasing. It’s a dish that has rightfully earned its place on tables, appealing to picky eaters and gourmands alike, proving that simple ingredients can indeed create extraordinary results. The recent surge in cauliflower's popularity isn't just a fleeting trend; it's a testament to its incredible versatility and the satisfying, almost sweet nuttiness that roasting coaxes out, turning it into a genuine comfort food.
For many, the aroma of cauliflower caramelizing in the oven evokes a sense of nostalgia, a throwback to wholesome family meals where simple, well-cooked vegetables were celebrated. Its enduring appeal lies in this beautiful simplicity – the promise of deliciousness achieved with minimal fuss, yet maximum flavor. This isn't about complicated techniques or exotic ingredients; it's about understanding how to treat one vegetable right to unlock its full, glorious potential.
Why This Roasted Cauliflower is a Must-Try & When to Shine
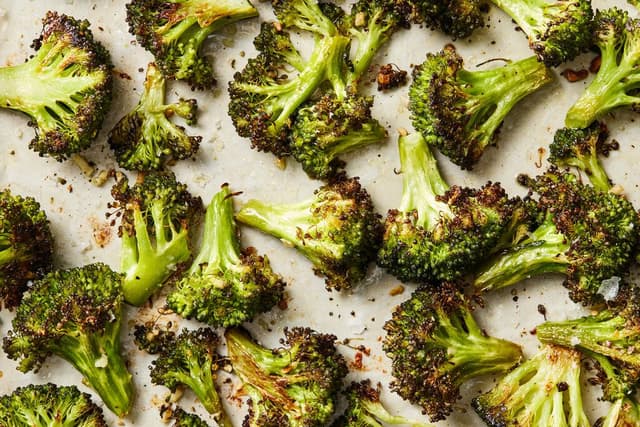
So, what makes perfectly roasted cauliflower so utterly irresistible? It's all about that delightful textural play: the edges become wonderfully crispy and caramelized, offering a satisfying slight crunch, while the interior turns meltingly tender and surprisingly sweet. Roasting works wonders, mellowing out any assertive cruciferous notes and unveiling a gentle, nutty sweetness that is simply divine. This transformation is precisely why it's become a favorite, even for those who might typically shy away from cauliflower.
Best Occasions to Serve Your Masterpiece:
Roasted cauliflower is wonderfully versatile, ready to grace your table on numerous occasions:
- Holiday Dinners: It's a fantastic, relatively easy-to-prepare side dish that beautifully complements grand festive mains, adding a touch of elegance without demanding too much attention.
- Potlucks & Family Gatherings: This dish travels well (when stored properly, of course!) and is consistently a crowd-pleaser. It’s often one of the first dishes to disappear at a potluck!
- Cozy Weekends & Weeknight Hero: It’s straightforward enough for a relaxed weekend meal yet sophisticated enough to serve when you have guests. It can even be a welcome, healthier alternative to roasted potatoes on a busy weeknight.
- Versatile Side or Appetizer: Serve it simply as a side, or dress it up with a flavorful dip to present as an enticing appetizer. Its ability to be delicious warm or at room temperature adds to its flexibility.

Basic Ingredients (Serves 4-6 people)
This recipe is designed to generously serve 4-6 people. Here’s what you’ll need:
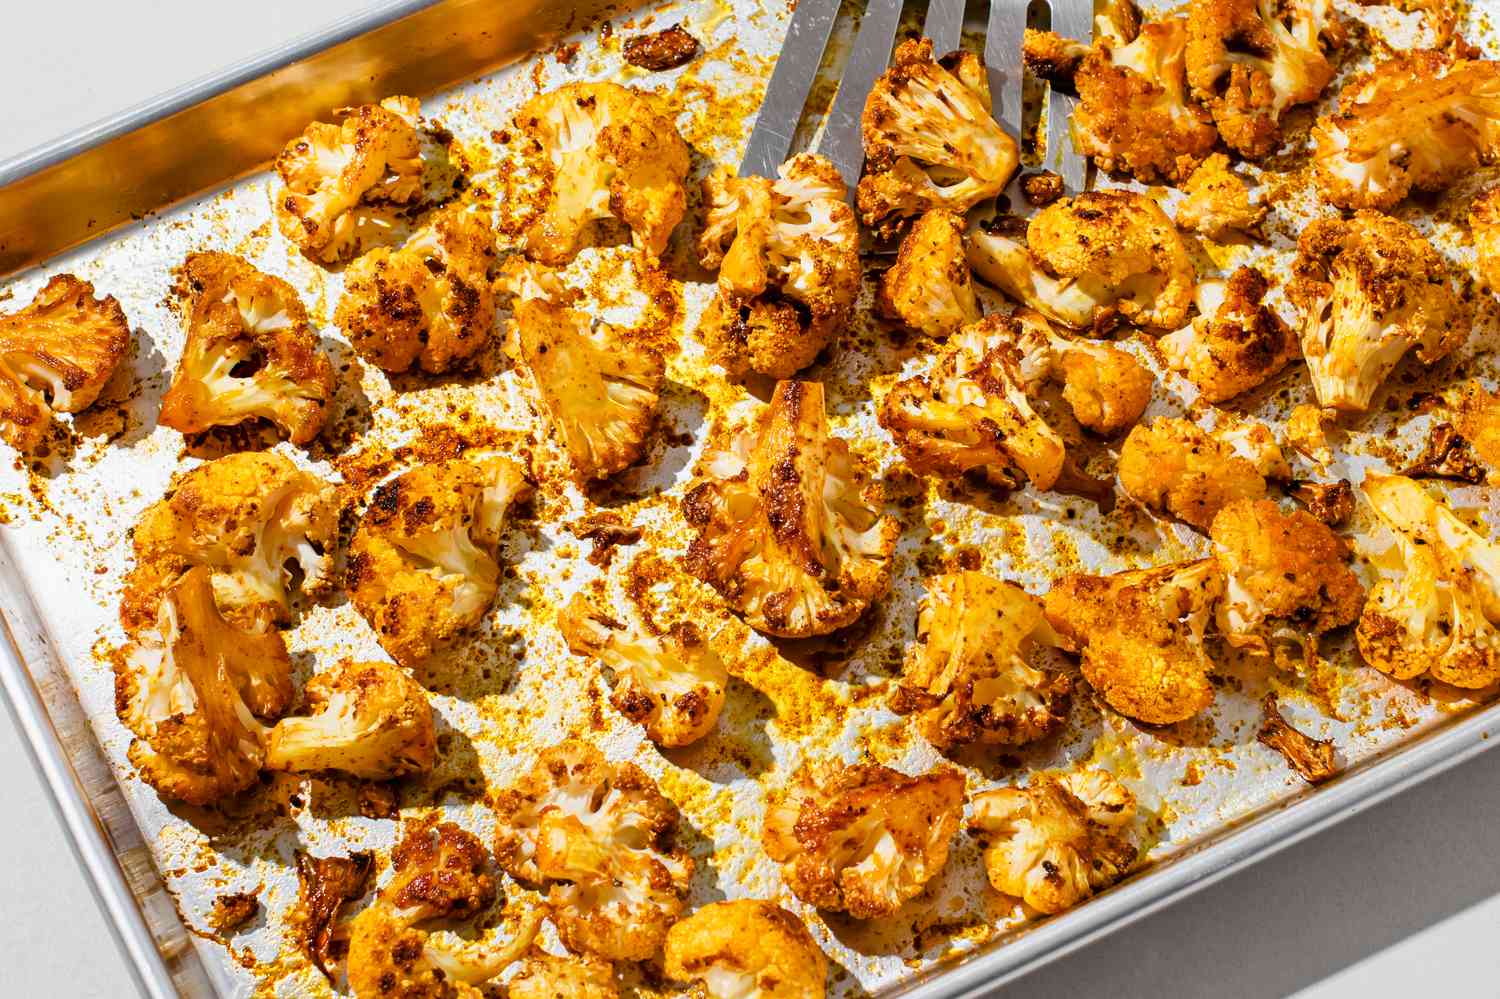
- Fresh Cauliflower (1 large head, approx. 2-2.5 lbs): This is the star of our show, providing a wonderfully mild, slightly sweet base that transforms into tender florets with delightful nutty, caramelized edges upon roasting.
- Extra Virgin Olive Oil (3-4 tablespoons): Crucial for conducting heat evenly, promoting beautiful golden-brown caramelization, and helping the seasonings adhere perfectly to every nook and cranny of the cauliflower florets.
- Kosher Salt (1 teaspoon, or to taste): Essential for enhancing the natural flavors of the cauliflower and drawing out slight moisture to aid in crisping; adjust based on your preference and the saltiness of any additions like Parmesan.
- Freshly Ground Black Pepper (1/2 teaspoon, or to taste): Adds a gentle warmth and pungent counterpoint to the cauliflower's sweetness, contributing to a well-rounded flavor profile that complements the other seasonings.
- Garlic (3-4 cloves, minced, OR 1 teaspoon garlic powder): Imparts a savory, aromatic depth that pairs exceptionally well with roasted cauliflower. Minced fresh garlic offers a brighter flavor, while garlic powder provides more uniform distribution.
- Optional: Grated Parmesan Cheese (1/4 to 1/3 cup): Adds a fantastic savory, umami-rich crust and a salty kick when sprinkled on towards the end of roasting, creating irresistible cheesy, crispy bits.
- Optional: Red Pepper Flakes (1/4 teaspoon, or to taste): For those who enjoy a little warmth, these flakes provide a subtle, pleasant kick that beautifully contrasts the cauliflower's mildness without overpowering it.
- Optional: Fresh Parsley (1-2 tablespoons, chopped, for garnish): A sprinkle of fresh parsley at the end adds a touch of vibrant color and a clean, herbaceous note, brightening the overall presentation and taste.

Step-by-Step Roasted Cauliflower Preparation
Follow these steps meticulously, and you'll be rewarded with perfectly roasted cauliflower every single time. Remember, the details matter in achieving that ideal balance of crispy and tender.
1. Preheat Oven & Prepare Pan: Set your oven to a robust 425∘F (220∘C). If you have one, place a large, rimmed baking sheet in the oven while it preheats. This high heat is the secret to achieving those coveted crispy, caramelized edges. Preheating the pan itself gives the cauliflower an immediate advantage, starting the browning process the moment it makes contact.
2. Prepare the Cauliflower: Wash and thoroughly dry your 1 large head of cauliflower. Remove the tough outer leaves and trim the stem flush with the bottom of the head. Cut the cauliflower into uniform bite-sized florets, aiming for pieces about 1.5-2 inches wide. Uniformity in size is key for even cooking, preventing smaller pieces from burning while larger ones remain underdone. Drying the cauliflower meticulously is crucial; any excess moisture will turn to steam, hindering that beautiful roast.
3. Season the Cauliflower Generously: In a large mixing bowl, combine the prepared cauliflower florets with 3-4 tablespoons of extra virgin olive oil. Add 3-4 minced garlic cloves (or 1 teaspoon of garlic powder if you prefer), 1 teaspoon of Kosher salt, and 1/2 teaspoon of freshly ground black pepper. If you're including a touch of heat, now is the time to add 1/4 teaspoon of red pepper flakes. Toss everything together thoroughly. Using a bowl ensures every floret gets an even coating of oil and seasonings, which translates to consistent flavor and browning all over.
4. Arrange for Roasting Success: Carefully spread the seasoned cauliflower florets in a single layer onto your preheated (or room temperature) baking sheet. The golden rule here is: do not overcrowd the pan! If your florets are looking a bit too cozy, it's far better to use two baking sheets. Giving each floret its own space allows the hot air to circulate freely, promoting true roasting and caramelization instead of steaming, which leads to a disappointingly mushy result.
5. Roast to Golden Perfection (First Stage): Place the baking sheet (or sheets) into the fully preheated oven and roast for 15-20 minutes. This initial roasting period is when the cauliflower starts to tenderize and the edges begin to take on a lovely golden hue. The exact timing can vary slightly depending on the actual size of your florets and the temperament of your oven.
6. Flip and Continue Roasting (Optional Parmesan Stage): After the initial 15-20 minutes, carefully remove the pan from the oven. Using a spatula, flip the cauliflower florets to expose their other sides to the direct heat. If you're indulging in the 1/4 to 1/3 cup of grated Parmesan cheese, now is the perfect moment to sprinkle it evenly over the cauliflower. Adding Parmesan later in the roasting process prevents it from burning while still allowing it to melt into a deliciously savory, crispy crust. If you're skipping the cheese, simply flip the florets and proceed.
7. Final Roast for Tenderness and Crisp: Return the pan to the oven and continue to roast for another 10-15 minutes. You're looking for the cauliflower to be perfectly tender when pierced with a fork, and for the edges to be beautifully golden brown, with some enticingly charred, crispy bits. The total roasting time will typically fall between 25-35 minutes. Keep a close eye on it during these last few minutes to achieve your ideal level of caramelization without any burning.
8. Garnish and Serve Hot: Once your cauliflower has reached roasted perfection, remove it from the oven. If you wish, transfer it to a warm serving dish. For a final flourish of color and fresh flavor, garnish with 1-2 tablespoons of freshly chopped parsley. Roasted cauliflower is truly at its best when served immediately, while it's still wonderfully hot and delightfully crispy.

Tips for the Perfect Roasted Cauliflower
Unlock the full potential of your roasted cauliflower with these essential tips, designed to ensure delicious, consistent results every time.
Achieve Supreme Caramelization:
- High Heat is Your Friend: Don't be tempted to lower the oven temperature. A robust 400∘F to 450∘F (200∘C to 230∘C) is what you need for that irresistible golden-brown exterior and crispy edges.
- No Crowding Allowed: This bears repeating! Give your cauliflower florets ample personal space on the baking sheet. This allows them to roast properly and develop color, rather than steam and become soggy. If in doubt, always use two pans.
- Direct Pan Contact for Browning: For the ultimate crispiness, especially on the bottom of the florets, consider roasting them directly on an unlined baking sheet. Some find that foil can sometimes inhibit maximum browning on the contact side.
Uniformity is Key for Even Cooking:
- Consistent Floret Size: Take a moment to cut your cauliflower into similar-sized pieces. This simple step ensures that all the florets cook at the same rate, preventing any from burning before others are tender.
- Consider the "Slab" Technique: For a different texture and even more surface area for browning, try cutting your cauliflower head into ½-inch thick slabs or "steaks" instead of traditional florets. This maximizes contact with the hot pan.
Maximize Flavor Infusion:
- Don't Skimp on Seasoning: Cauliflower has a mild flavor that truly blossoms with good seasoning. Be generous with your olive oil, salt, pepper, and garlic to build a delicious foundation.
- Toss in a Bowl for Even Coating: Always toss your cauliflower with the oil and spices in a separate mixing bowl before spreading it on the baking sheet. This guarantees that every nook and cranny is evenly coated for consistent flavor and browning.
- Spice it Up Your Way: Feel free to experiment! A pinch of smoked paprika, ground cumin, or even onion powder can add wonderful layers of complexity and warmth to your roasted cauliflower.
Pre-Roast Preparations for Perfection:
- Dry it Well, Really Well: After washing, make sure to pat the cauliflower florets thoroughly dry with paper towels or a clean kitchen towel. Any lingering surface moisture is the enemy of crispiness and will lead to steaming.
- Preheat Your Pan (The Expert Move): For an extra edge in browning, place your baking sheet in the oven while it preheats. Adding the cauliflower to an already hot pan creates an instant sizzle and kickstarts the caramelization process beautifully.

Delicious Serving Ideas
Roasted cauliflower is wonderfully versatile. Here are some ideas to inspire you, from classic pairings to more creative applications:
The Classic Sidekick:
- It’s the perfect accompaniment to hearty mains like roasted chicken, grilled steak, baked fish, or savory pork chops.
- A non-negotiable and always welcome addition to any holiday spread or traditional Sunday roast.

Hearty & Wholesome Bowls:
- Toss warm roasted cauliflower into grain bowls with quinoa, farro, or pearl couscous, adding chickpeas and a vibrant lemon-tahini dressing for a complete meal.
- Stir it into pasta salads for a textural boost or add to warm pasta dishes with a light sauce for extra vegetables and satisfying substance.

Flavorful Appetizer or Snack:
- Serve warm or even at room temperature alongside a creamy yogurt dip, flavorful hummus, or a zesty spicy aioli for an easy and impressive appetizer.
- For an elegant starter, sprinkle generously with extra Parmesan cheese and fresh herbs like chopped parsley or chives just before serving.

Creative Twists to Explore:
- Use your delicious roasted cauliflower as a flavorful topping for homemade pizzas or rustic flatbreads.
- Coarsely mash leftover roasted cauliflower and mix it with herbs to create a unique filling for omelets or savory pastries.
Tips for Storing and Reheating
Enjoying leftover roasted cauliflower is easy if you store and reheat it correctly, preserving its wonderful taste and texture.
Storing Leftovers:
- Cool Completely First: Always allow your roasted cauliflower to cool down to room temperature before you even think about storing it. This prevents condensation from forming inside the container, which can lead to sogginess.
- Airtight Container is Key: Transfer the cooled cauliflower to an airtight container. This is crucial for maintaining freshness and preventing it from absorbing other odors in the refrigerator.
- Shelf Life: When stored properly in an airtight container in the fridge, your roasted cauliflower will keep well for 3 to 5 days.
Reheating Tips (Preserving That Coveted Texture):
- Oven or Toaster Oven for Best Results: The best way to bring back some of that original crispness is to reheat the cauliflower on a baking sheet in a 350∘F (175∘C) oven for about 8-10 minutes, or until it's warmed through and nicely re-crisped.
- Air Fryer Magic: If you have an air fryer, it’s an excellent tool for quickly reheating roasted cauliflower and helping it regain its delightful crisp texture.
- Microwave (Use with Caution): While you can reheat roasted cauliflower in the microwave, be aware that it will likely result in a softer texture and you'll lose most, if not all, of the crispiness. It’s best avoided if texture is a priority for you.
- Stovetop Option for Quick Warm-Up: You can also gently reheat the cauliflower in a dry skillet over medium heat, tossing it occasionally until it's warmed through. This can help retain some texture better than a microwave.
Conclusion
There you have it – the path to perfectly roasted cauliflower, a dish that effortlessly balances simplicity with profound flavor. Its comforting warmth, delightful textures, and incredible versatility make it a true kitchen staple. I wholeheartedly encourage you to embrace this recipe; the rewarding experience of transforming a humble vegetable into such a delicious and crowd-pleasing star will undoubtedly make it a recurring favorite in your home.
Frequently Asked Questions
Q: Why does my roasted cauliflower sometimes turn out mushy instead of crispy?
A: Mushiness is typically a result of too much moisture, often from overcrowding the pan, roasting at a temperature that's too low, or not drying the cauliflower adequately before roasting. These factors cause the cauliflower to steam rather than roast, preventing that desirable crispy texture from developing.
Q: What's the ideal oven temperature for roasting cauliflower to get it golden and tender?
A: A high temperature, generally between 400∘F and 450∘F (200∘C - 230∘C), is your best bet for perfect results. This level of heat allows the cauliflower to develop a beautiful golden-brown color and wonderfully crispy edges while ensuring the inside becomes perfectly tender and sweet.
Q: Can I use frozen cauliflower for this roasted cauliflower recipe?
A: While you technically can roast frozen cauliflower, it generally won't achieve the same delightful level of crispiness as fresh cauliflower due to its inherently higher moisture content. For the best possible texture and flavor, fresh cauliflower is highly recommended for this recipe.
Q: How do I know when my roasted cauliflower is perfectly cooked and ready?
A: Your roasted cauliflower is done when it's fork-tender (meaning a fork can pierce a floret easily) and it showcases a beautifully golden-brown, caramelized exterior with some delightfully crispy, slightly charred edges. The ultimate test? Taste a piece to ensure it's cooked to your liking!
Works cited
- The Comforts of Cauliflower | Dot Foods, accessed May 20, 2025, https://www.dotfoods.com/newsroom/devour-by-dot-blog/comforts-of-cauliflower/
- More than 26 Reasons to Add Cauliflower to Your Menu | Whole Foods Market, accessed May 20, 2025, https://www.wholefoodsmarket.com/tips-and-ideas/archive/more-26-reasons-add-cauliflower-your-menu
- Roasted Cauliflower (Two Ways!) - Chelsea's Messy Apron, accessed May 20, 2025, https://www.chelseasmessyapron.com/roasted-cauliflower/
- Roasted Cauliflower As A Side Or Appetizer - On The Go Bites, accessed May 20, 2025, https://www.onthegobites.com/roasted-cauliflower-side-appetizer/
- Roasted Garlic Cauliflower Recipe - Allrecipes, accessed May 20, 2025, https://www.allrecipes.com/recipe/54675/roasted-garlic-cauliflower/
- Roasted Cauliflower - RecipeTin Eats, accessed May 20, 2025, https://www.recipetineats.com/roasted-cauliflower/
- Best Recipe for Roasted Cauliflower - Carlsbad Cravings, accessed May 20, 2025, https://carlsbadcravings.com/roasted-cauliflower/
- How to make Parmesan Roasted Cauliflower Recipe - Crazy for Crust, accessed May 20, 2025, https://www.crazyforcrust.com/parmesan-roasted-cauliflower-recipe/
- Roasted Cauliflower Recipe | Food Network Kitchen | Food Network, accessed May 20, 2025, https://www.foodnetwork.com/recipes/food-network-kitchen/roasted-cauliflower-recipe-1945072
- Best Roasted Cauliflower Recipe - How to Roast Cauliflower - Food52, accessed May 20, 2025, https://food52.com/recipes/85960-best-roasted-cauliflower-recipe
- Our Favorite Garlic-Parmesan Roasted Cauliflower - Dishing Out Health, accessed May 20, 2025, https://dishingouthealth.com/parmesan-roasted-cauliflower/
- Crispy Roasted Cauliflower Recipe | Packed with GOODNESS & Easy to Make - YouTube, accessed May 20, 2025, https://www.youtube.com/watch?v=4VI2G78Hjeo&pp=0gcJCdgAo7VqN5tD