Unlocking the Art of the Perfect Tamagoyaki
The Allure of Japanese Egg Rolls: A Culinary Journey Awaits
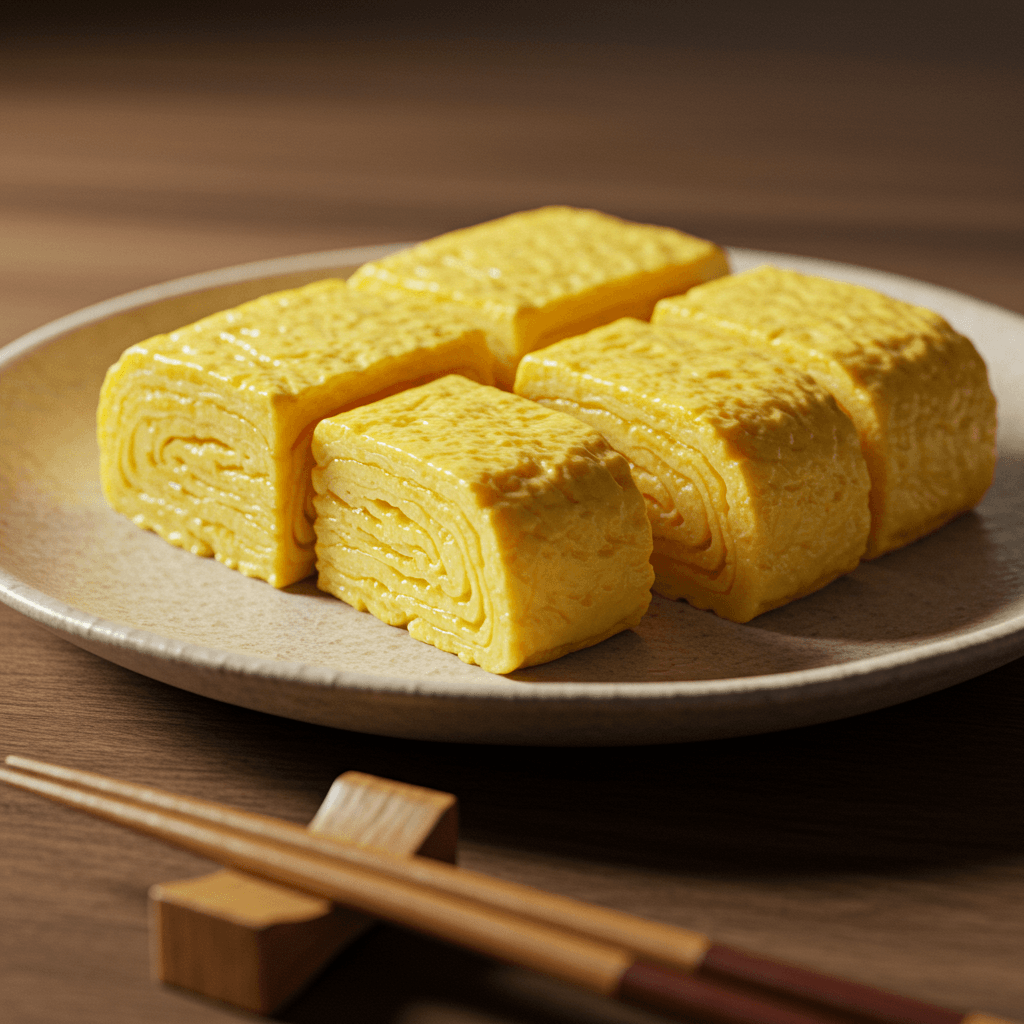
Imagine a culinary creation that is both simple and profoundly elegant, a dish that whispers tales of comfort and tradition with every delicate bite. That, my friends, is Tamagoyaki – the iconic Japanese rolled omelet that’s far more than just scrambled eggs. It's a staple in bento boxes, a beloved breakfast item, and a testament to the meticulous artistry of Japanese cooking. If you've ever been captivated by its golden layers and subtly sweet-savory profile, you're about to embark on a journey to master this delightful dish.

Beyond the Omelet: Tamagoyaki's Cultural Significance
While often translated as a Japanese omelet, Tamagoyaki stands distinctly apart from its Western counterpart. Its preparation involves carefully layering and rolling thin sheets of seasoned egg, resulting in a dense, fluffy, and often sweet-savory rectangular block. In Japan, Tamagoyaki is a symbol of home cooking, frequently packed into children's bento boxes as a nutritious and aesthetically pleasing side. It's also a common sight in sushi restaurants, either as a stand-alone nigiri or a filling for maki rolls, showcasing its versatility and integral role in Japanese culinary culture.

A Taste of Home: Why Tamagoyaki Deserves a Spot in Your Kitchen
There's a unique satisfaction that comes from recreating a beloved dish in your own kitchen, and Tamagoyaki offers just that. Its gentle flavors and comforting texture make it an instant crowd-pleaser. Whether you're looking to elevate your breakfast game, impress your dinner guests with a touch of Japanese elegance, or simply add a healthy and delicious component to your meal prep, Tamagoyaki is a fantastic skill to acquire. It's an accessible entry point into Japanese cooking that rewards patience with pure deliciousness.
Why Mastering Tamagoyaki is Worth Your While
Elevated Breakfasts: Beyond the Ordinary Scramble
Tired of the same old scrambled eggs or fried eggs every morning? Tamagoyaki offers a refreshing and sophisticated alternative. Its delicate layers and custardy texture transform an everyday breakfast into a special treat. It's a fantastic way to start your day with something both nourishing and visually appealing, setting a peaceful tone for the hours ahead.
Impress Your Guests: An Elegant Dish, Effortlessly Made
Imagine serving a beautiful platter of golden, perfectly rolled Tamagoyaki to your brunch guests. Its unique appearance and subtle flavors are sure to spark conversation and admiration. What's even better? Despite its impressive look, the technique for making Tamagoyaki is surprisingly straightforward to learn, making it an elegant dish that’s well within reach for any home cook.
Versatile Side Dish: From Bento Boxes to Gourmet Meals
Tamagoyaki’s versatility is one of its greatest strengths. It's a star in a traditional bento box, pairing perfectly with rice, fish, and vegetables. But its utility extends far beyond! Serve it alongside grilled fish for a light dinner, as a topping for ramen or udon, or even as a unique appetizer for a more gourmet spread. Its adaptability makes it a valuable addition to your culinary repertoire.

Decoding the Ingredients: Quality Over Quantity
The beauty of Tamagoyaki lies in its simplicity, but this simplicity demands quality ingredients. Each component plays a vital role in achieving that authentic, harmonious flavor.
The Perfect Egg Selection: Freshness and Flavor
Unsurprisingly, eggs are the star. Opt for the freshest, highest-quality eggs you can find. Fresh eggs have vibrant yolks and firm whites, which contribute to a better texture and richer flavor in your Tamagoyaki. Think of them as the canvas for your culinary artwork.
Dashi's Essential Role: Umami Depth
Dashi, a fundamental Japanese broth, is the secret weapon for authentic Tamagoyaki. Made from kombu (kelp) and katsuobushi (bonito flakes), it infuses the eggs with a profound umami depth that sets Tamagoyaki apart from any other egg dish. You can find instant dashi granules or make it from scratch for the best flavor.

Mirin's Sweet Touch: Balancing Flavors
Mirin, a sweet rice wine, adds a subtle sweetness and a beautiful sheen to the Tamagoyaki. It’s crucial for balancing the savory notes and achieving that characteristic Japanese flavor profile. Ensure you're using true mirin, not mirin-style seasoning, for the best results.
Soy Sauce's Subtle Salinity: Achieving Harmony
A touch of soy sauce (shoyu) adds essential salinity and a deeper savory note, harmonizing with the sweetness of the mirin and the umami of the dashi. Use a good quality, light Japanese soy sauce to avoid overpowering the delicate egg flavor.
Crafting the Perfect Tamagoyaki Batter: A Symphony of Flavors
The batter is the soul of your Tamagoyaki. Getting it right is crucial for both flavor and texture.
Precise Measurements: Achieving the Ideal Balance
Unlike a casual scramble, Tamagoyaki thrives on precision. The ratio of eggs to dashi, mirin, and soy sauce is key. Too much liquid and it will be difficult to roll; too little, and it will be dry. Follow recipes closely, especially when you're starting out, to achieve that ideal custardy yet firm texture.
Whisking to Perfection: Airy Texture Secrets
Whisk the eggs gently but thoroughly. You want to combine the yolks and whites without incorporating too much air, which can lead to large, unsightly bubbles. A light whisking until just combined will result in a smoother, more uniform texture. Some chefs even strain their egg mixture to remove any bits of chalaza or air bubbles.
Resting for Success: Ensuring Even Cooking
Once your batter is mixed, let it rest for at least 10-15 minutes at room temperature. This crucial step allows any remaining air bubbles to dissipate and gives the flavors a chance to meld. A rested batter will cook more evenly and produce a more tender, consistent Tamagoyaki.
The Art of Tamagoyaki: Mastering the Technique
This is where the magic happens – the transformation of liquid egg into a layered golden roll. It requires a bit of practice, but each attempt brings you closer to perfection.
Pan Selection and Preparation: The Foundation for Success
Traditionally, Tamagoyaki is made in a rectangular pan called a makiyakinabe or tamagoyaki pan. This shape simplifies the rolling process. If you don't have one, a small non-stick round pan can work, though it requires slightly different rolling adjustments. Regardless of the pan, ensure it's impeccably clean and seasoned with a thin layer of oil, wiped almost dry, before you begin.
Temperature Control: The Key to Fluffy Perfection
Medium-low heat is your best friend. Too high, and the egg will cook too quickly, becoming rubbery and difficult to roll. Too low, and it will take ages and might not achieve that beautiful golden hue. The goal is a gentle, even heat that allows each thin layer to set just enough before rolling.
Layering and Rolling: Achieving that Signature Shape
Pour a thin layer of egg batter into the oiled, heated pan, just enough to cover the bottom. As soon as it sets but is still slightly moist on top, gently roll it from one end to the other, creating the first layer. Push the rolled egg to one side of the pan, re-oil the empty space, and pour another thin layer of batter, lifting the previously rolled egg slightly so the new batter flows underneath. Cook and roll again, incorporating the new layer with the old. Repeat this process until all the batter is used, building up layers of egg.

Adapting to Round Pans: Navigating Different Cookware
If using a round pan, the technique is similar, but instead of rolling a neat rectangle, you'll be creating a roughly rectangular shape as you roll. You might fold the edges of each layer inward before rolling to help maintain a somewhat rectangular form. It's a bit more free-form but yields a similarly delicious result.
Pressing for Perfection: Achieving Compactness and Shape
Once your Tamagoyaki is fully rolled, immediately remove it from the pan and, if you have one, place it on a sushi mat (makisu). Roll it tightly in the mat and press gently for a few minutes. This helps to compact the layers, perfect the rectangular shape, and maintain its integrity. If you don't have a mat, a few layers of paper towel can also work to gently shape it.
Tamagoyaki Tips & Tricks from the Pros
Preventing Sticking: Mastering the Art of Non-stick
Beyond using a non-stick pan, proper oiling is paramount. After each layer is rolled, wipe the empty part of the pan with an oil-soaked paper towel. This ensures a fresh, non-stick surface for the next pour, preventing tears and ensuring smooth rolling. Don't be shy about reapplying a tiny bit of oil.
Achieving Even Browning: Consistent Heat Control
The key to beautiful, even browning (or lack thereof, if you prefer a lighter roll) is consistent heat. If you notice one part of the pan getting hotter than another, adjust your burner. Don't rush it; patience will be rewarded with a uniformly cooked and colored Tamagoyaki.
The Importance of Rest: Letting the Flavors Marry
Just as you rest the batter, allow your finished Tamagoyaki roll to rest for a few minutes before slicing. This allows the internal heat to redistribute, the layers to fully set, and the flavors to fully meld. Resting prevents the Tamagoyaki from falling apart when sliced and enhances its overall texture.
Beyond the Basics: Exploring Flavor Variations
While the classic Tamagoyaki is a delight, don't hesitate to experiment! The beauty of this dish is its adaptability.
Adding Herbs & Spices: A World of Culinary Possibilities
Finely chopped fresh herbs like chives, parsley, or Japanese shiso can add a fragrant twist. A pinch of shichimi togarashi (Japanese seven-spice blend) can introduce a subtle warmth and a hint of spice for those who enjoy a little kick.
Incorporating Vegetables: Creative Additions
For extra texture and nutrition, try adding finely minced or grated vegetables to your batter. Cooked spinach, shredded carrots, finely diced mushrooms, or even green onions can be folded into the egg mixture for a colorful and flavorful variation.

Sweet & Savory Twists: Exploring Taste Combinations
Adjust the mirin and soy sauce ratios to lean more towards sweet or savory. For a sweeter Tamagoyaki, popular in some regions of Japan, increase the mirin or add a tiny pinch of sugar. For a bolder savory profile, you might add a touch more dashi or even some finely grated cheese (though this veers from traditional, it's a delicious modern twist!).
Common Mistakes to Avoid: Ensuring Tamagoyaki Success
Every chef makes mistakes, but learning from common pitfalls will accelerate your journey to Tamagoyaki mastery.
Overcooking: Maintaining Fluffy Texture
Overcooked Tamagoyaki becomes tough and rubbery. The key is to remove each layer from the heat as soon as it's just set, while still slightly moist. The residual heat will continue to cook it, and you want to preserve that delicate, fluffy interior.
Uneven Rolling: Achieving Consistent Thickness
Uneven rolling can lead to a Tamagoyaki that's thicker on one side than the other or has gaps in the layers. Try to maintain a consistent pressure as you roll and ensure each new layer of batter evenly covers the pan and slightly seeps under the previous roll.
Ignoring Rest Time: Underestimating Flavor Development
Skipping the rest time for both the batter and the finished roll is a common mistake. A rested batter cooks better, and a rested finished product holds its shape and allows flavors to fully develop and mellow. Patience truly is a virtue here.
Your Masterpiece Awaits: The Perfect Tamagoyaki
Congratulations! You've navigated the nuances of ingredients, mastered the technique, and now, your perfect Tamagoyaki awaits. Slice it with care and admire those beautiful, golden layers.
Serving Suggestions: Elevating Your Culinary Creation
Serve your Tamagoyaki warm or cold, sliced into elegant rectangles. It's wonderful on its own, nestled in a bento box, or as a side to grilled fish, rice, or miso soup. For a creative twist, use it as a sushi topping or cube it into a fresh green salad. A sprinkle of shichimi togarashi or a drizzle of Kewpie mayonnaise can add an extra layer of flavor.
Storage Tips: Preserving Freshness
Tamagoyaki can be made ahead of time and stored in an airtight container in the refrigerator for up to 2-3 days. It's delicious cold, making it perfect for meal prep or packed lunches. You can gently reheat it in a microwave for a few seconds if you prefer it warm, but be careful not to overcook.
Frequently Asked Questions
- Q: Can I use other types of soy sauce? A: While traditional Japanese light soy sauce (shoyu) is recommended for authentic flavor and color, you can experiment. Tamari is a great gluten-free alternative, but be mindful of its saltiness. Darker soy sauces might alter the color and have a stronger, less delicate flavor, so use sparingly.
- Q: What if my tamagoyaki is too dry? A: Dryness is typically a sign of overcooking or insufficient liquid in your batter. Ensure your heat is low-medium, and remove each layer from the heat when it's just set but still looks moist. Double-check your dashi-to-egg ratio; a bit more dashi can make it more tender.
- Q: Can I make this ahead of time? A: Absolutely! Tamagoyaki is an excellent make-ahead dish. Prepare it, let it cool completely, then wrap it tightly in plastic wrap or store it in an airtight container in the refrigerator for up to 2-3 days. It's often enjoyed cold in bentos.
- Q: What are some creative ways to serve tamagoyaki? A: Beyond bento and breakfast, try Tamagoyaki as a topping for ramen or udon, cubed and added to a salad, tucked into small sandwiches or sliders, or as part of a Japanese-inspired brunch platter. It also makes a fantastic, delicate side for grilled proteins.