Introduction
Dealing with a dead car battery is a common frustration, but jump-starting is a straightforward skill that can get a vehicle back on the road quickly. Since the process involves live electrical currents and flammable gases, safety is the top priority. This guide provides a comprehensive, step-by-step approach to safely using either traditional jumper cables or a portable jump starter, covering everything from preparation to post-jump procedures, enabling drivers to handle the situation confidently and with minimal risk.
The Essential Jump-Start Toolkit
Success and safety in jump-starting a car begin long before the cables are ever connected. It starts with having the right equipment on hand. Attempting the procedure without the proper tools not only increases the risk of failure but can also create a hazardous situation. Thinking of this equipment as a pre-prepared "jump-start kit" rather than a list of items to find in an emergency is a fundamental shift toward proactive safety. A well-equipped driver is prepared for common real-world complications, such as darkness or corroded battery terminals, transforming a stressful event into a manageable task.
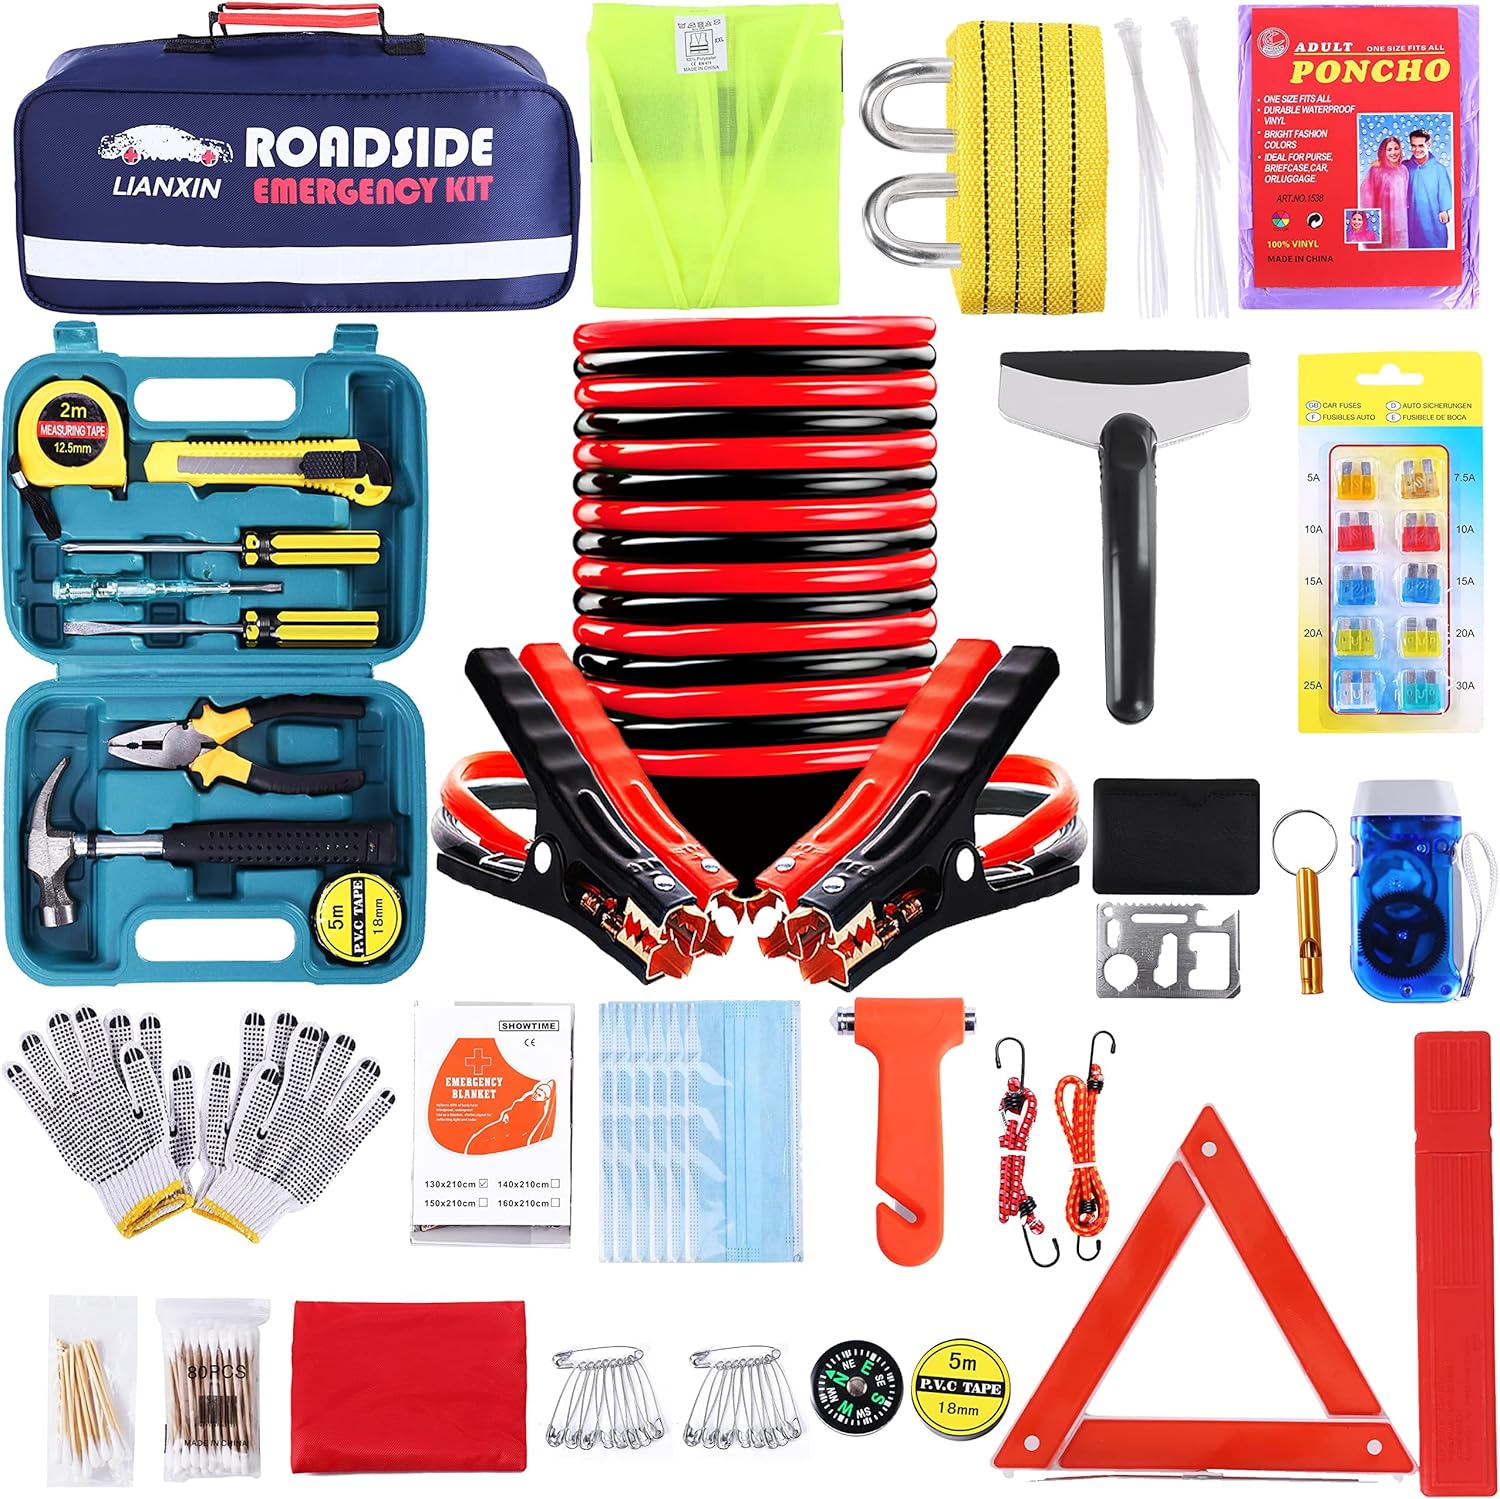
The essential toolkit for a jump-start includes the following items:
- A Power Source: This is the core of the operation and comes in one of two forms.
- Jumper Cables and a Donor Vehicle: The traditional method requires a set of quality jumper cables and a second vehicle with a healthy battery of the same voltage (typically 12V for most passenger cars).
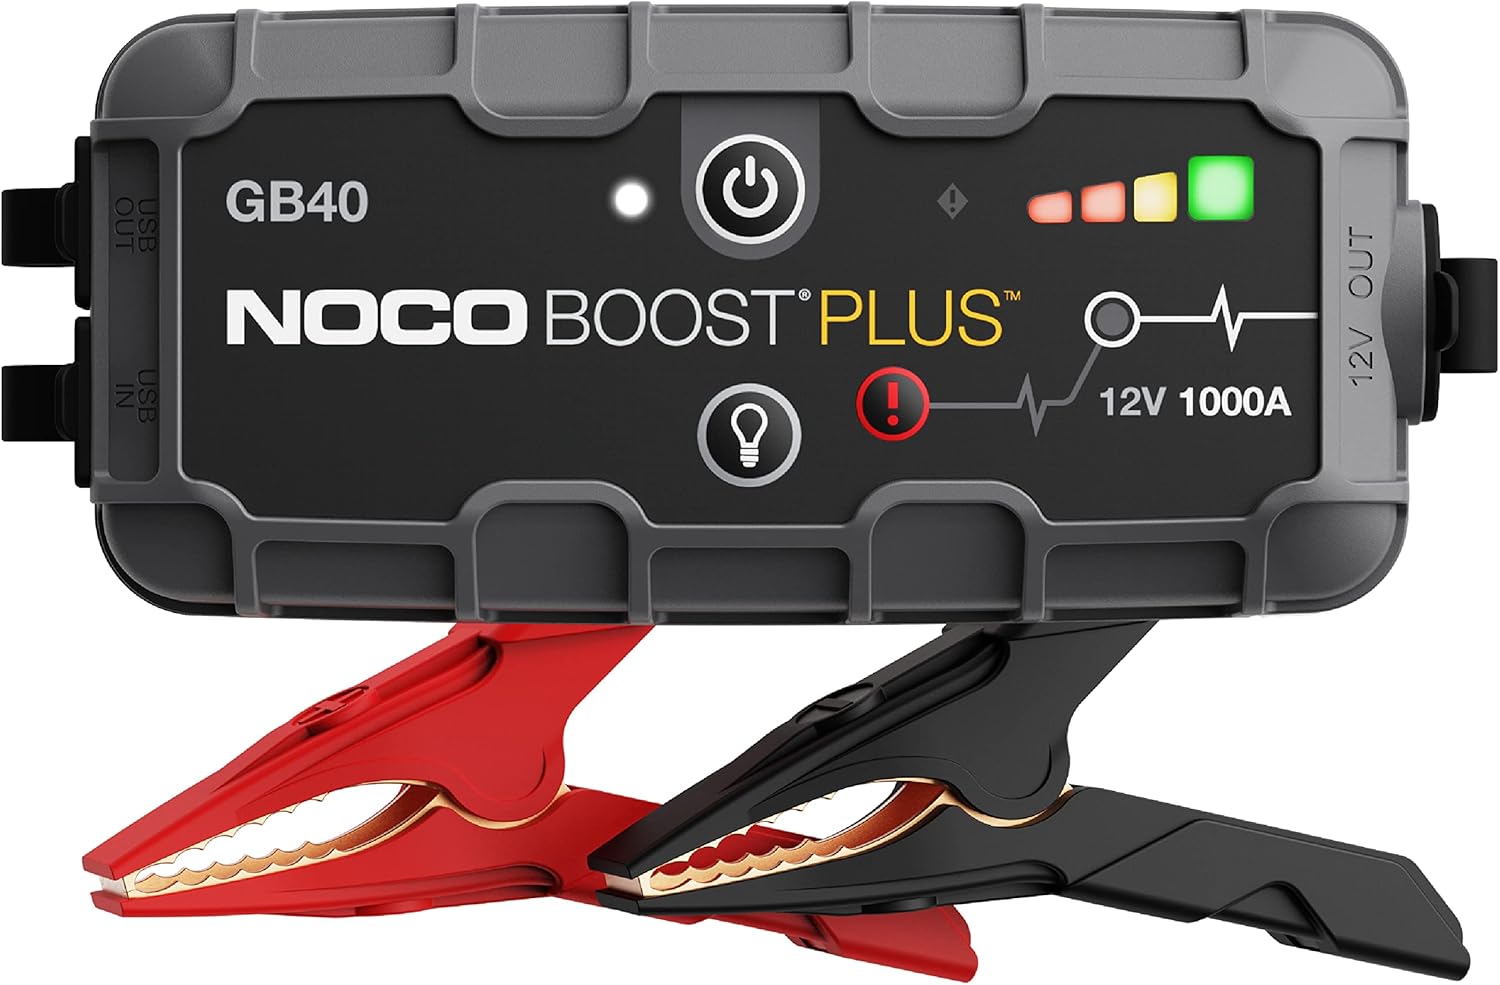
- A Portable Jump Starter: A modern, self-contained alternative is a battery booster pack, which eliminates the need for a second car and is often easier and safer to use.
- Personal Protective Equipment (PPE): This equipment is not optional; it is a critical layer of protection against potential hazards.
- Safety Glasses or Goggles: Car batteries contain corrosive acid and can vent flammable hydrogen gas. In the rare event of a spark causing a battery to malfunction or spray fluid, eye protection is essential to prevent serious injury.
- Insulated or Heavy-Duty Gloves: These protect hands from dirt, grime, and battery corrosion. They also provide a barrier against accidental contact with hot engine parts or battery terminals.
- Supporting Tools: These items address common issues that can complicate a jump-start.
- Flashlight: A dead battery does not adhere to a 9-to-5 schedule. A reliable flashlight, preferably a magnetic one that can be attached to the car's body, is invaluable for working safely in low-light conditions.
- Wire Brush or Battery Terminal Cleaner: Corrosion, which appears as a white or greenish powdery substance on the battery posts, can prevent a solid electrical connection and is a common reason for a failed jump-start. A dedicated tool or even a stiff wire brush can quickly clean the terminals to ensure a good connection.
- Vehicle Owner's Manual: This is the most overlooked yet one of the most important tools. The manual provides the definitive location of the battery (which is not always under the hood; it can be in the trunk or under a seat) and outlines any vehicle-specific instructions or warnings related to jump-starting. Some modern vehicles, particularly hybrids, have dedicated jump-starting posts and procedures that must be followed to avoid damaging sensitive electronics.

Choosing the Right Tool for the Job
Not all jumper cables are created equal, and the quality of the cables used is a critical factor that determines both the success of the jump-start and the safety of the procedure. Using inadequate cables is a frequent point of failure and can introduce unnecessary risks, such as overheating. The cables are the bridge that carries a significant electrical current from the donor battery to the dead one; if that bridge is too weak, it can fail at the worst possible moment.
Understanding the key specifications of jumper cables empowers a driver to purchase a reliable set or evaluate the ones they already own.
- Wire Gauge (Thickness): The most important specification of a jumper cable is its wire gauge. This refers to the thickness of the actual wire inside the insulation. In the American Wire Gauge (AWG) system, a lower number indicates a thicker wire. A thicker wire has less electrical resistance, allowing it to transfer more current (amperage) safely and efficiently. A common mistake is to judge cables by the thickness of the plastic insulation alone; a quality cable has thick copper or copper-coated aluminum wire inside. For jump-starting, a thin, high-gauge cable (like 10- or 12-gauge) can become dangerously hot, potentially melting the insulation and creating a fire or short-circuit hazard.
- Length: Jumper cable length involves a trade-off between convenience and performance.
- Longer Cables (20-25 feet): These offer maximum flexibility, allowing the donor vehicle to be positioned behind or at an angle to the dead car, which is useful in tight parking spots. However, the increased length also means slightly more electrical resistance, which can result in a minor power loss.
- Shorter Cables (10-16 feet): These are more electrically efficient but require the two vehicles to be parked close together, typically nose-to-nose or side-by-side.
- Amperage Rating: This rating specifies the amount of electrical current the cables are designed to handle. A higher amperage rating is necessary for starting larger engines, which require more power to turn over.
Read This Before You Touch Anything
Before a single clamp is attached, a thorough safety inspection is mandatory. In the stress of a breakdown, it can be tempting to rush the process, but taking a few moments to assess the situation can prevent serious injury and costly vehicle damage. This checklist is designed to give the user explicit permission to stop and call for professional help if conditions are unsafe. The goal is not to jump-start the car at all costs, but to do so only if it is safe. This approach is fundamental to responsible vehicle maintenance and aligns with the safety-first principle of all automotive procedures.
Follow these non-negotiable inspection steps:
- Consult the Owner's Manual: This is the first and most critical action. The manufacturer's instructions are the ultimate authority. The manual will confirm the battery's location and, most importantly, detail any specific jump-starting procedures, designated connection points (common in many modern cars), or warnings against jump-starting altogether. Ignoring this step can lead to damage to sensitive onboard computers.
- Inspect the Dead Battery for Damage: Carefully examine the battery case. Look for any visible cracks, signs of leaking fluid, or severely damaged terminals. A distinct smell of rotten eggs is a sign of leaking sulfuric acid. If any of these signs are present,DO NOT ATTEMPT TO JUMP-START THE VEHICLE. A damaged battery is unstable and can be extremely dangerous. The only safe course of action is to call for professional roadside assistance or a tow service.
- Check for a Frozen Battery: In freezing temperatures, the liquid electrolyte inside a battery can freeze, causing the battery case to swell or bulge. Attempting to jump-start a frozen battery can cause it to rupture or explode. If the battery case appears distorted or swollen, do not proceed. The battery must be thawed safely by a professional before any service is attempted.
- Create a Safe Environment: Take a moment to secure the area and yourself.
- Turn Everything Off: Before making any connections, ensure both vehicles are completely turned off with the keys removed from the ignition. All electrical accessories—including headlights, interior lights, radio, and climate control systems—must be switched off in both cars. This critical step prevents sudden power surges that can damage the sensitive electronic control units (ECUs) in modern vehicles.
A Step-by-Step Guide Using Another Car
This section details the traditional method of jump-starting using a second vehicle and a set of jumper cables. The process is broken down into four clear steps. Following the sequence precisely is essential for safety and effectiveness. A simple mnemonic—Red to Dead, Red to Donor, Black to Donor, Black to Metal—can help recall the correct connection order during a stressful moment. At all times during this procedure, it is critical to ensure that the metal clamps of the jumper cables do not touch each other.

Step 1: Position the Vehicles and Prepare
- Park the donor vehicle (with the good battery) close to the car with the dead battery. The cars can be positioned nose-to-nose or side-by-side, as long as the jumper cables can comfortably reach both batteries without being stretched taut.
- Crucially, ensure that the two vehicles are not touching each other. Contact between the vehicles can create an unintended electrical path.
- Engage the parking brake on both cars. For automatic transmissions, shift into Park (P). For manual transmissions, shift into Neutral (N).
- Open the hoods of both vehicles and securely prop them open. Locate the batteries and identify the positive (+) and negative (-) terminals. The positive terminal is almost always marked with a "+" sign and may have a red plastic cover. The negative terminal is marked with a "-" sign. If the terminals are covered in corrosion, use a wire brush to clean them now to ensure a solid connection.9
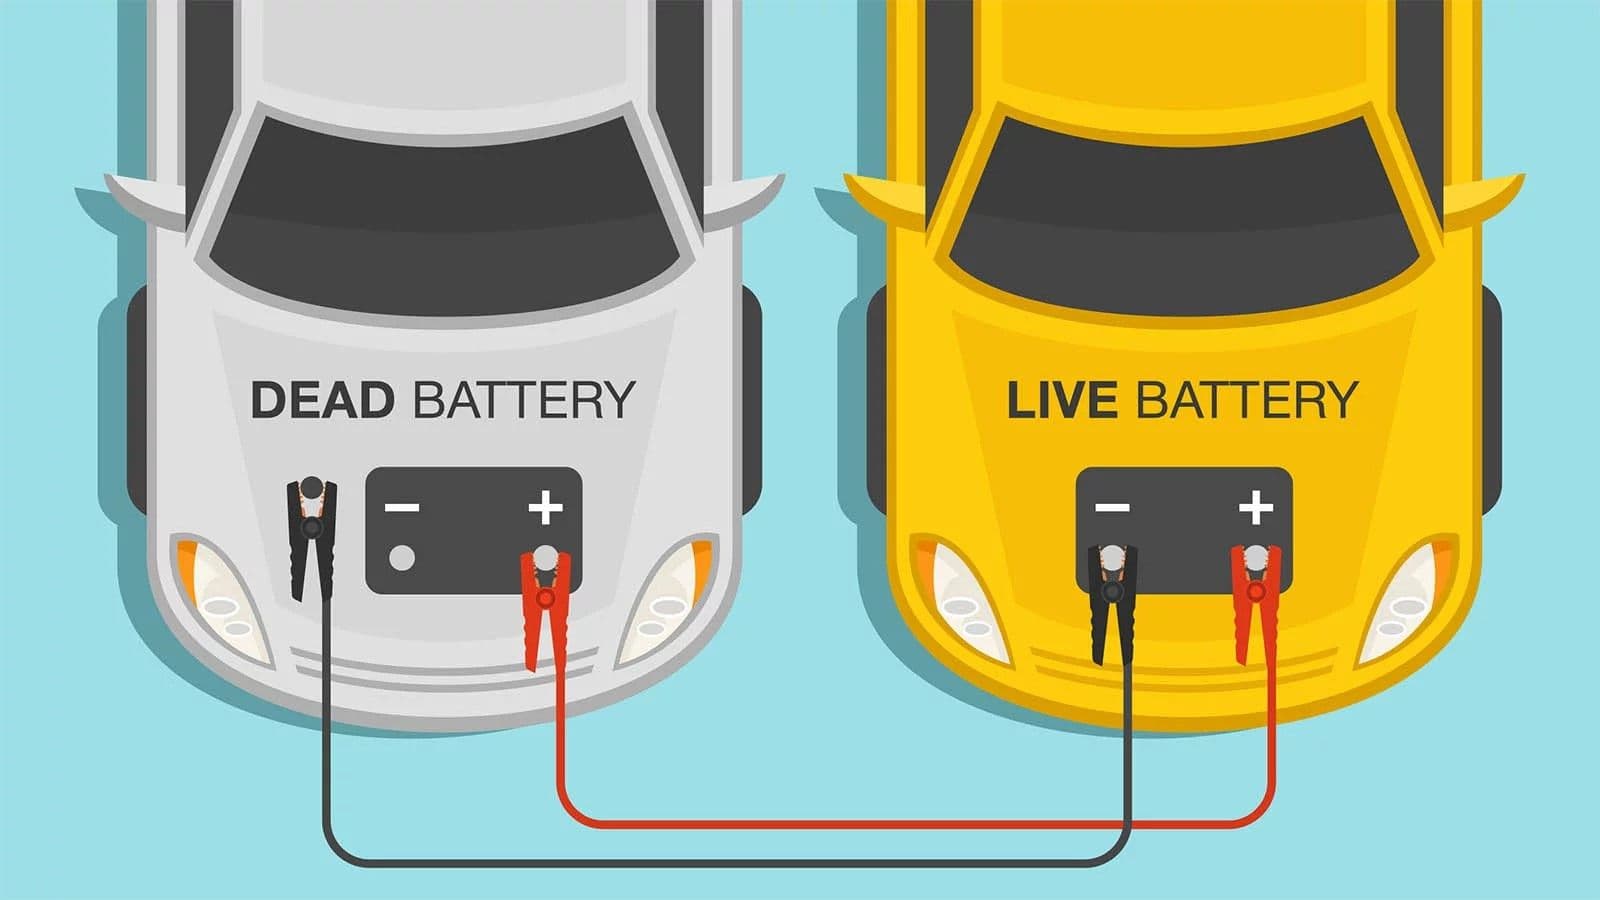
Step 2: Connect the Jumper Cables (The "Four Connections" Method)
- First Connection (Red to Dead): Take one of the red (positive) clamps and firmly attach it to the positive (+) terminal of the dead battery. Wiggle the clamp to ensure its metal teeth are making good contact with the battery post.
- Second Connection (Red to Donor): Attach the other red (positive) clamp to the positive (+) terminal of the donor battery (the good battery).
- Third Connection (Black to Donor): Connect one of the black (negative) clamps to the negative (-) terminal of the donor battery.
- Fourth Connection (Black to Metal): This is the most critical connection for safety. Attach the final black (negative) clamp to an unpainted, bare metal surface on the engine block or chassis of the car with the dead battery. A sturdy, unpainted bolt head is an ideal grounding point. This connection should be made at least a foot away from the battery itself.
The reason for this specific final connection is rooted in simple physics. A car battery can vent small amounts of flammable hydrogen gas during charging and discharging. The final connection in an electrical circuit is where a small, incidental spark is most likely to occur. By making this connection on a metal ground point far from the battery, any potential spark is kept safely away from the hydrogen gas, mitigating the risk of an explosion. While connecting directly to the negative terminal of the dead battery might work, the grounding method is the universally recommended safe practice by automotive professionals.
Step 3: Start the Cars
- Start the engine of the donor vehicle and let it run at a normal idle for several minutes (a range of 2-5 minutes is commonly recommended). This allows the alternator of the working car to begin charging the dead battery.
- After a few minutes, attempt to start the car with the dead battery. If it starts successfully, proceed to the next step.
- If the vehicle does not start, do not crank the engine for more than a few seconds at a time. Turn the key off, and let the donor vehicle continue to run for another 5 to 10 minutes to provide a more substantial charge to the dead battery, then try again.
Step 4: Disconnect the Cables (Reverse Order)
Once the disabled vehicle is running smoothly, the jumper cables must be removed in the exact reverse order of how they were connected. This sequence is designed to safely de-energize the circuit and prevent sparks near the batteries.
- Disconnect the black (negative) clamp from the metal grounding point on the car that was just started.
- Disconnect the black (negative) clamp from the donor battery.
- Disconnect the red (positive) clamp from the donor battery.
- Disconnect the red (positive) clamp from the newly started car's battery.
Be careful not to let the clamps touch each other or any metal parts of the car while they are being removed.
Using a Portable Jump Starter
For drivers seeking a more convenient and often safer alternative to traditional jumper cables, the portable jump starter is an excellent solution. These compact, powerful lithium-ion battery packs eliminate the need for a second vehicle, making them ideal for situations where help is unavailable or another car cannot get close enough. Many models also include built-in safety features like reverse polarity protection, which prevents damage if the clamps are accidentally connected incorrectly, and often double as power banks to charge electronic devices like phones.

The process for using a portable jump starter is generally simpler than the two-car method:
- Ensure the Jump Starter is Charged: A portable jump starter is only useful if it has power. It is crucial to check its charge level periodically (e.g., once a month) and recharge it after each use or as recommended by the manufacturer. A dead jump starter is of no help in an emergency.
- Connect the Clamps: With the vehicle's ignition off, connect the clamps from the jump starter to the car's battery. Always refer to the device's specific instructions, but the typical procedure is:
- Connect the red (positive) clamp to the positive (+) terminal of the car's dead battery.
- Connect the black (negative) clamp to the negative (-) terminal of the battery. While some safety guides still recommend attaching the black clamp to a metal ground as a best practice, most modern portable starters are designed for direct connection to the negative terminal. Many have built-in spark-suppression technology.
- Turn On the Jump Starter: Once the clamps are securely connected, turn on the portable jump starter. Most units have a power button and an indicator light to show they are ready.
- Start Your Car: Get into the driver's seat and attempt to start the vehicle as normal. It should start immediately if the dead battery was the only issue.
- Disconnect and Stow: Once the car's engine is running, turn off the jump starter. Then, carefully disconnect the clamps from the battery, removing the black (negative) clamp first, followed by the red (positive) clamp. Safely store the jump starter for the next time it might be needed.
You're Running! Critical Next Steps
A successful jump-start is a moment of relief, but the job is not finished once the engine is running. A common and critical mistake is to shut the car off too soon, which will likely result in needing another jump-start moments later. It is essential to understand what happens after the jump and what actions are required to ensure the battery is properly recharged.
The jump-start itself only provides a temporary, high-amperage boost sufficient to crank the engine. It does not meaningfully recharge the battery. The actual recharging is performed by the vehicle's alternator, a small generator driven by the engine's accessory belt. When the engine is running, the alternator produces electricity to power the car's systems and, crucially, to replenish the charge in the battery.
To allow the alternator to do its job, follow these steps:
- Keep the Engine Running: After the jumper cables or portable starter have been safely disconnected and stored, let the newly started car run continuously. The consensus among automotive experts and service professionals is that the vehicle should run for at least 30 minutes to give the battery a sufficient surface charge to be able to restart on its own.
- Driving is Better Than Idling: While letting the car idle in the driveway for 30 minutes is better than nothing, taking it for a drive is more effective. Driving at normal speeds keeps the engine's RPMs higher than at idle, which allows the alternator to spin faster and generate more electricity, thus charging the battery more efficiently. A steady drive on a highway or main road is preferable to stop-and-go city traffic.
It is also important to manage expectations. The jump-start has resolved the immediate symptom (a non-starting car), but it may not have fixed the underlying problem. A battery can die for several reasons: it may have been accidentally drained (e.g., by leaving headlights on), it may be old and no longer able to hold a charge, or there may be a fault in the vehicle's charging system (i.e., a bad alternator). If the car fails to start again after the 30-minute recharge period, the jump was merely a temporary fix. It is highly recommended to have the battery and charging system professionally tested, especially if the battery is more than three years old or the cause of the battery drain is unknown.
What to Do If Your Car Still Won't Start
If a car still won't start after a jump attempt, the issue is likely more complex than a simple dead battery. Understanding the symptoms can help diagnose the problem: a rapid clicking sound often points to a bad starter motor , while dashboard lights turning on without the engine cranking may indicate a faulty ignition switch or neutral safety switch. If the car starts but dies immediately after the cables are removed, it's a strong sign of a failed alternator. Lastly, if there is no response at all—no lights or sounds—the cause could be a poor connection, faulty jumper cables, or a battery that has completely failed and cannot accept a charge.
Frequently asked question
Q: My car started with the jump, but it died as soon as I disconnected the cables. What does that mean?
A: This is a classic symptom of a failed alternator. The jump-start provided enough power from the other vehicle or jump pack to start your engine, but your car was running on that external power source. Once the cables were removed, your car's own charging system, managed by the alternator, was unable to produce the electricity needed to keep the engine running and power its electronics. In this situation, the vehicle will need to be professionally serviced to have the charging system and alternator tested and likely replaced.
Q: I followed all the steps, but my car just makes a rapid clicking sound and won't start. What's wrong?
A: A rapid clicking sound when you turn the key usually indicates that the issue is with the starter motor, not just the battery. The clicking you hear is the starter's solenoid engaging, but the motor itself lacks the mechanical integrity or sufficient power to turn the engine over. While this can sometimes happen if the battery is so deeply drained that the jump isn't providing enough amperage, it more often points to a faulty starter. You can try letting the donor vehicle charge the battery for another 10 to 15 minutes, but if the clicking persists, the starter is the most likely culprit and will need professional inspection.
Q: Is it better to buy a portable jump starter or just keep jumper cables in my car?
A: The best choice depends on your needs and priorities.
- Jumper cables are the traditional, affordable option and have the advantage of never needing to be recharged. However, their major drawback is that they require a second, working vehicle, which may not always be available or able to park close enough for the cables to reach.
- A portable jump starter is a self-contained unit that eliminates the need for a donor car, making it far more convenient and often faster to use. Many modern lithium-ion models are compact and include valuable safety features like reverse polarity protection, as well as extras like built-in flashlights and USB ports to charge your phone. Their main disadvantage is that they are more expensive and must be kept charged to be effective in an emergency.
Works cited
- How to Jump Start Your Car In 5 Easy Steps - Car and Driver, fecha de acceso: julio 24, 2025, https://www.caranddriver.com/features/a26801962/how-to-jump-start-car/
- Essential Tools and Equipment for Jump Starting a Car - Big League Towing Company, fecha de acceso: julio 24, 2025, https://www.bigleaguetowing.com/towing-service/car-jumpstart-service/essential-tools-and-equipment-for-jump-starting-a-car/
- JUMP STARTING PLANT AND VEHICLES - Safequarry, fecha de acceso: julio 24, 2025, https://www.safequarry.com/toolbox/Jumpstartingplantandvehicles.pdf.pdf
- Jump start (vehicle) - Wikipedia, fecha de acceso: julio 24, 2025, https://en.wikipedia.org/wiki/Jump_start_(vehicle)
- 5 Safety Tips for Jump-Starting Your Vehicle - SafetyCompany.com, fecha de acceso: julio 24, 2025, https://www.safetycompany.com/safetyblog/5-safety-tips-for-jumpstarting-your-vehicle/
- Jump Start Your Battery the Safe Way - Valvoline™ Global, fecha de acceso: julio 24, 2025, https://www.valvolineglobal.com/en/blog/education/jump-start-your-battery-the-safe-way/
- Jump Starting – How to Make it Safe and Effective - Clore Automotive, fecha de acceso: julio 24, 2025, https://cloreautomotive.com/jump-starting-how-to-make-it-safe-and-effective/
- How to Jump Start a Car: 6 Easy Steps - Mercury Insurance, fecha de acceso: julio 24, 2025, https://www.mercuryinsurance.com/resources/basics-101/how-to-jump-start-a-car.html
- How to Jump a Car the Right Way and Get Back on the Road - Meineke, fecha de acceso: julio 24, 2025, https://www.meineke.com/blog/jump-start-car-battery-right-way/
- How to Hook up Jumper Cables to a Battery (With Pictures) - wikiHow, fecha de acceso: julio 24, 2025, https://www.wikihow.com/Hook-up-Jumper-Cables
- How To Jump Start A Car Safely - Boggs Automotive - Warsaw, IN, fecha de acceso: julio 24, 2025, https://boggsautomotive.com/blog/how-to-jump-start-a-car-safely/
- How to Use Jumper Cables - Auto | HowStuffWorks, fecha de acceso: julio 24, 2025, https://auto.howstuffworks.com/how-to-use-jumper-cables.htm
- Does the size of jumper cables matter for a car? - Quora, fecha de acceso: julio 24, 2025, https://www.quora.com/Does-the-size-of-jumper-cables-matter-for-a-car
- Most Common Mistakes People Make When Jump Starting A Battery, fecha de acceso: julio 24, 2025, https://www.towrecoverassist.com/common-mistakes-people-make-when-jump-starting-a-battery/
- Best Jumper Cables for 2025, Tested - Car and Driver, fecha de acceso: julio 24, 2025, https://www.caranddriver.com/car-accessories/g43439484/best-jumper-cables-tested/
- What are the Best Jumper Cables for My Car or Truck? - Batteries Plus, fecha de acceso: julio 24, 2025, https://www.batteriesplus.com/blog/power/jumper-cables
- Avoiding Common Mistakes When Using a Car Jump Starter - Tend Industrial Supplies, fecha de acceso: julio 24, 2025, https://tendsupplies.com/blog/avoiding-common-mistakes-when-using-a-car-jump-starter/
- Jumper cable gauge chart, fecha de acceso: julio 24, 2025, https://irp.cdn-website.com/539bc6c5/files/uploaded/38442841.pdf
- Jumper Cables: FAQs on Gauge, Length, and Clamps - In The Garage with CarParts.com, fecha de acceso: julio 24, 2025, https://www.carparts.com/blog/jumper-cables-faqs-on-gauge-length-and-clamps/
- Google Ads policies - Advertising Policies Help, fecha de acceso: julio 24, 2025, https://support.google.com/adspolicy/answer/6008942?hl=en
- Jump-Starting Car Batteries FAQ | Chapel Hill Tire, fecha de acceso: julio 24, 2025, https://www.chapelhilltire.com/is-jumping-starting-a-dead-car-battery-safe/
- How Long Should a Car Run After Getting a Jump? - J.D. Power, fecha de acceso: julio 24, 2025, https://www.jdpower.com/cars/shopping-guides/how-long-should-a-car-run-after-getting-a-jump
- How To Jump A Car A Step By Step Guide | Stone Mountain Volkswagen, fecha de acceso: julio 24, 2025, https://www.stonemountainvw.com/how-to-jump-a-car-a-step-by-step-guide/
- 5 Common Mistakes Drivers Make With Jumper Cables - The Auto Doc, fecha de acceso: julio 24, 2025, https://www.theautodoc.net/blog/5-common-mistakes-drivers-make-with-jumper-cables
- How To Jump Start Your Car - GEICO Insurance - YouTube, fecha de acceso: julio 24, 2025, https://www.youtube.com/watch?v=uW9taTgu7HY
- (General) Proper way to jump start a car? : r/MechanicAdvice - Reddit, fecha de acceso: julio 24, 2025, https://www.reddit.com/r/MechanicAdvice/comments/17p52my/general_proper_way_to_jump_start_a_car/
- What To Do Before, During, and After Jump-Starting a Car - In The Garage with CarParts.com, fecha de acceso: julio 24, 2025, https://www.carparts.com/blog/what-to-do-before-during-and-after-jump-starting-a-car/
- How to Use a Portable Jump Starter - AutoZone - AutoZone.com, fecha de acceso: julio 24, 2025, https://www.autozone.com/diy/battery/battery-charging/how-to-use-a-portable-jump-starter
- How to Use a Portable Jump Starter (Step-by-Step Guide) – Vantrue, fecha de acceso: julio 24, 2025, https://www.vantrue.com/blogs/news/how-to-use-a-portable-jump-starter
- How to use a portable jump-starter. Love, Dad - YouTube, fecha de acceso: julio 24, 2025, https://www.youtube.com/shorts/Z0DnrFhUaHw
- How to Use a Portable Jump Starter - YouTube, fecha de acceso: julio 24, 2025, https://www.youtube.com/watch?v=pU_Lv8F5yyQ
- How to jump start a car in 10 steps (with video) | RAC Drive, fecha de acceso: julio 24, 2025, https://www.rac.co.uk/drive/advice/car-maintenance/how-to-jump-start-a-car/
- I just jump-start my dead car. What's the next step? - Reddit, fecha de acceso: julio 24, 2025, https://www.reddit.com/r/cars/comments/korhdm/i_just_jumpstart_my_dead_car_whats_the_next_step/
- harristirecompany.com, fecha de acceso: julio 24, 2025, https://harristirecompany.com/car-wont-jump-start/#:~:text=It's%20important%20to%20check%20and,though%20the%20lights%20come%20on.
- Car Won't Start After Jumpstart? Common Causes & Fixes - RepairPal, fecha de acceso: julio 24, 2025, https://repairpal.com/symptoms/car-battery-wont-jumpstart
- Reasons Why Your Car Won't Start With a Jump - In The Garage ..., fecha de acceso: julio 24, 2025, https://www.carparts.com/blog/reasons-why-your-car-wont-start-with-a-jump/
- Cool guide to jumping a car with cables. : r/coolguides - Reddit, fecha de acceso: julio 24, 2025, https://www.reddit.com/r/coolguides/comments/j530cp/cool_guide_to_jumping_a_car_with_cables/
- Common mistakes to avoid when jump-starting a car battery, fecha de acceso: julio 24, 2025, https://nashvilletirerepairandcarbattery.com/2023/03/01/common-mistakes-to-avoid-when-jump-starting-a-car-battery/