The Ultimate Guide to Perfect Instant Pot Brown Rice
Cooking brown rice can often feel like a culinary gamble. We've all been there: hovering over a pot on the stove, hoping to avoid the dreaded outcomes of burnt bottoms, mushy textures, or crunchy, undercooked grains. The process can be time-consuming and frustrating, but there is a better way. The Instant Pot transforms this tricky whole grain into a foolproof, hands-off masterpiece, delivering perfectly fluffy and wholesome rice every single time.
This simple, reliable method makes enjoying the nutty flavor and health benefits of brown rice more convenient than ever. Whether you're a seasoned meal prepper or just looking for a healthy, versatile side dish for your weeknight dinners, mastering brown rice in the Instant Pot is a true kitchen game-changer. It’s a foundational recipe that simplifies healthy eating and opens the door to countless delicious meals.
Why Make This Delicious Recipe & When to Serve It
The most significant advantage of this recipe is its "set it and forget it" nature. Gone are the days of babysitting a simmering pot. Once you lock the lid and press the button, you are free to focus on other parts of your meal, help with homework, or simply relax. This convenience is a lifesaver for busy weeknight dinners and a major stress-reducer in the kitchen.
The Instant Pot's sealed pressure-cooking environment eliminates the guesswork. It controls the temperature and minimizes evaporation, ensuring that your rice cooks perfectly and consistently every single time. This reliability builds cooking confidence, especially with a grain that many people find difficult to master.
Beyond convenience, the results are simply superior. The high-pressure environment tenderizes the tough outer bran layer of the brown rice more effectively than stovetop methods, resulting in a softer texture and a milder, nuttier flavor that even picky eaters will enjoy. When you use broth, the pressure infuses every grain with deep, savory flavor.
This versatile side dish is perfect for almost any occasion. It's an ideal partner for quick weeknight meals, a fantastic base for healthy lunches like grain bowls, and the undisputed champion of meal prep. Make one large batch on the weekend, and you'll have a healthy carbohydrate ready for quick and easy meals all week long.

Basic Ingredients (Serves 4-6)
- Long-Grain Brown Rice (2 cups / 390g): The star of the show. Using long-grain varieties like brown basmati or jasmine results in fluffy, separate grains with a delightful nutty flavor and a satisfyingly chewy texture that holds up well in a variety of dishes.
- Cold Water or Low-Sodium Broth (2 ½ cups / 625ml): This precise 1:1.25 ratio of rice to liquid is the secret to a perfectly tender yet fluffy texture. Less moisture evaporates in the sealed Instant Pot, so less liquid is needed compared to stovetop methods. Using broth is a simple way to infuse the rice with a deep, savory flavor from the inside out.
- Kosher Salt (¾ teaspoon): This is an essential flavor enhancer, not just a seasoning. Salt elevates and brings out the natural nutty notes of the whole grain, preventing the final dish from tasting bland or flat and making it more delicious on its own.
- Olive Oil or Butter (1 tablespoon, optional): This optional addition serves two important functions. It adds a subtle richness to the flavor profile and, more practically, helps prevent the rice from sticking together and reduces the starchy foam that can sometimes sputter from the valve during pressure release.
Step-by-Step Preparation
- Rinse the Rice Thoroughly: Measure out 2 cups of long-grain brown rice and place it into a fine-mesh strainer. Rinse the rice under cold, running water for at least 30 seconds, using your hand to swish the grains around until the water running out is noticeably clearer. This vital step removes excess surface starch, which is the key to preventing a gummy texture and ensuring fluffy, separate grains in the final product. Drain the rice exceptionally well to maintain the precise liquid ratio.
- Combine Ingredients in the Pot: Transfer the well-drained rice to the inner pot of your Instant Pot. Pour in the 2 ½ cups of cold water or broth, then add the ¾ teaspoon of kosher salt and the optional 1 tablespoon of olive oil or butter. Give all the ingredients a quick but thorough stir to make sure the salt is evenly distributed and that every grain of rice is fully submerged beneath the surface of the liquid.
- Pressure Cook on High: Secure the lid on the Instant Pot, ensuring it is locked in place, and turn the steam release valve to the "Sealing" position. Select the "Pressure Cook" or "Manual" button—it is critical that you do not use the "Rice" button, as it is calibrated for white rice—and use the +/- buttons to set the cook time to 22 minutes on High Pressure. The Instant Pot will take about 5-10 minutes to build pressure before the timer begins to count down.
- Perform a Natural Pressure Release (NPR): Once the 22-minute cooking cycle is complete, leave the Instant Pot alone. Allow the pressure to release naturally for at least 10 minutes; for an even fluffier texture, 15 minutes is ideal. The display will show a timer counting up, such as "L0:10". This resting period is non-negotiable, as it allows the rice to finish steaming gently and absorb any remaining moisture, which is crucial for achieving the perfect texture and preventing a watery result. After the time has passed, carefully turn the valve to the "Venting" position to release any remaining steam.
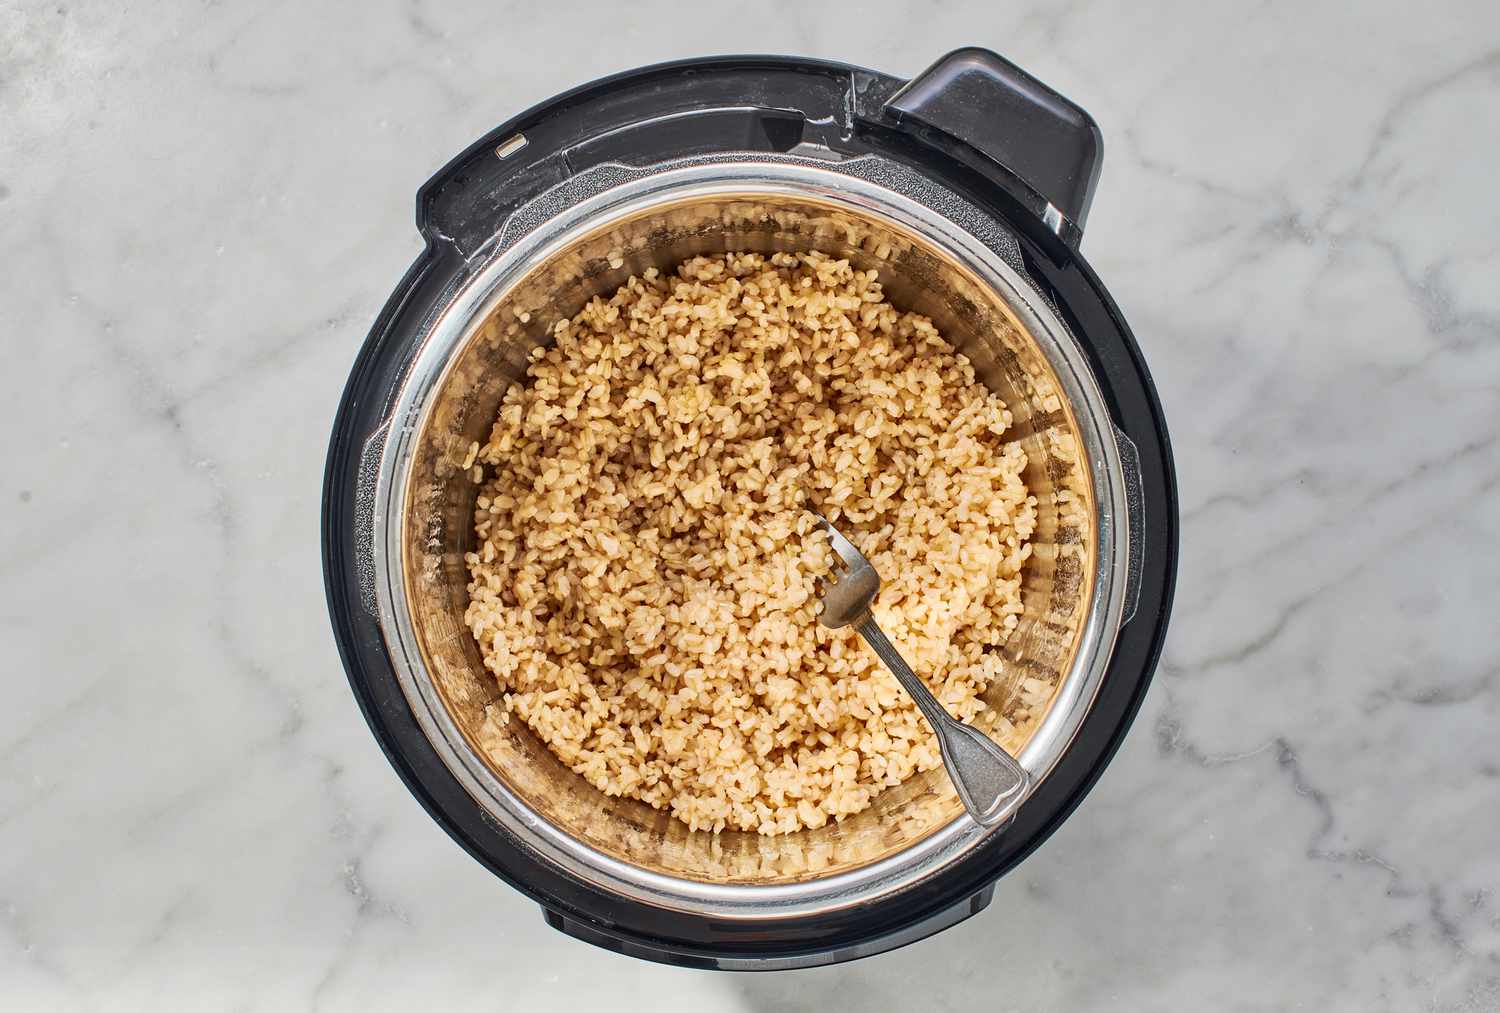
- Fluff and Serve: After the floating valve has dropped completely, it is safe to open the lid. Be sure to tilt the lid away from your face to avoid the hot steam. The rice may look a bit compacted at first. Use a fork or a rice paddle to gently fluff the rice, separating the grains and releasing trapped steam. If the rice appears slightly wet, let it rest with the lid off for a minute or two to allow the excess moisture to evaporate. Your perfectly cooked brown rice is now ready to enjoy.

Tips for the Perfect Recipe
- For a Chewier, Firmer Texture: If you prefer your brown rice with a more pronounced, al dente bite, simply adjust the liquid ratio. Use a 1:1 ratio of rice to liquid (e.g., 2 cups rice to 2 cups water). Keep the 22-minute cook time for a firm-but-tender result, or experiment with a 15-minute cook time and a 5-minute NPR for an even chewier texture.
- For Extra-Soft Rice: If you enjoy exceptionally soft and tender rice, stick with the main recipe's 1:1.25 ratio but extend the natural pressure release to a full natural release. This means you simply wait for the float valve to drop on its own, which can take 20 to 30 minutes. This extended, gentle steaming period will yield the softest possible grains.
- Boost Flavor by Toasting: To dramatically deepen the rice's inherent nutty flavor, use the "Sauté" function before pressure cooking. Add the optional oil or butter to the pot, then add the rinsed and well-dried rice. Sauté for 2-3 minutes, stirring constantly, until the grains are fragrant. Press "Cancel," then add your liquid and proceed with the recipe.
- Infuse with Aromatics: For an incredibly fragrant and flavorful result, toss in aromatics along with your liquid. A few cloves of smashed garlic, a bay leaf, a cinnamon stick, or a few whole cardamom pods work wonderfully. Simply remove them with a spoon before you fluff and serve the rice.
- Cook a Bigger Batch for Best Results: The Instant Pot cooks most evenly when it isn't underfilled. For the most consistent texture, it's best to cook at least 1.5 to 2 cups of dry rice at a time. This ensures all the grains are properly submerged and cook at the same rate. Since leftovers freeze beautifully, there's no downside to making more.

Serving Ideas
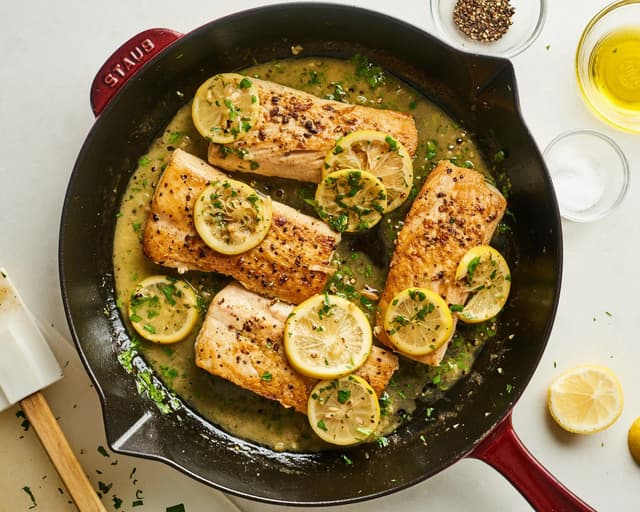
- As a Simple, Elegant Side: Serve the brown rice plain to accompany grilled chicken, baked salmon, or roasted vegetables. For a quick burst of freshness, finish it with a generous squeeze of lemon or lime juice and a sprinkle of fresh chopped herbs like cilantro or parsley just before serving.
- The Foundation for Delicious Bowls: Use the perfectly cooked rice as a hearty and nutritious base for a variety of meal bowls.
- Burrito Bowls: Top with seasoned black beans, corn salsa, shredded lettuce, avocado, and your favorite protein for a healthy, deconstructed burrito.
- Mediterranean Bowls: Create a vibrant bowl with grilled chicken or chickpeas, diced cucumber, cherry tomatoes, Kalamata olives, feta cheese, and a drizzle of lemon-tahini dressing.
- Bulk up Soups and Stews: Stir leftover cooked brown rice directly into your favorite soups and stews, like a classic chicken noodle, a hearty minestrone, or a spicy bean chili. It adds wonderful texture and makes the meal more substantial and filling.
- Perfect for Healthy Stir-Fries: Chilled, day-old brown rice is the ideal ingredient for making fantastic fried rice. The firm, separate grains hold their shape perfectly in a hot wok or skillet when tossed with scrambled eggs, diced vegetables, your choice of protein, and a savory soy sauce mixture.
- Create a Filling for Stuffed Vegetables: Mix the cooked rice with ingredients like cooked Italian sausage, sautéed onions, herbs, and Parmesan cheese. Use this delicious mixture to stuff hollowed-out bell peppers or acorn squash and bake for a stunning and complete meal.

Tips for Storing and Reheating
Storing Leftovers
- Cool Down Quickly: For optimal food safety and texture, it is important to cool cooked rice promptly. Spread the leftovers in a single, even layer on a baking sheet and allow it to cool at room temperature for about 30-60 minutes before packaging for storage.
- Refrigerate for the Week: Once cooled, transfer the rice into an airtight container. It will stay fresh and ready to use in the refrigerator for up to 4 days, making it perfect for quick lunches and dinners.
- Freeze for Future Meals: For longer-term storage, portion the cooled rice into individual freezer-safe ziplock bags. Squeeze out as much air as possible, lay the bags flat to save space, and freeze. The rice will maintain its quality in the freezer for up to 3 months.
Reheating Tips
- Microwave Method (Best for Fluffiness): Place the desired amount of rice in a microwave-safe bowl. For every cup of rice, sprinkle about 1 to 2 tablespoons of water or broth over the top. Cover the bowl with a damp paper towel or a microwave-safe lid and heat for 1-3 minutes, until steaming hot. The added liquid is essential, as it creates steam to rehydrate the grains and restore their original fluffy texture.
- Stovetop Method: Add the leftover rice to a small saucepan with a splash of water or broth to create steam. Cover the pot and heat over medium-low heat, stirring occasionally to prevent sticking, until the rice is warmed through and has regained its softness.
Conclusion
Say goodbye to the days of gummy, burnt, or undercooked brown rice. By embracing the simple, hands-off magic of the Instant Pot, you can unlock a world of perfectly fluffy, nutritious, and versatile meals with minimal effort. This reliable recipe is more than just a side dish; it's a foundational tool for healthier eating and stress-free cooking that will quickly become an indispensable staple in your kitchen.
Frequently Asked Questions
Q: Why did my brown rice come out mushy or crunchy?
A: Mushy rice usually means too much water, while crunchy rice often needs more cook time or liquid. Use a 1:1.25 rice-to-water ratio and cook for 22 minutes with a 10-minute natural release for best results. Adjust only if needed for your specific appliance.
Q: Can I double this recipe?
A: Yes, you can double the recipe for meal prep by using 4 cups of rice and 5 cups of liquid. Keep the cooking time at 22 minutes on High Pressure; the only change is that the Instant Pot will take longer to reach pressure. The results will be just as good.
Q: Do I have to rinse the brown rice?
A: Rinsing is highly recommended, even though it’s technically optional. It removes excess starch that can make rice sticky and helps prevent foamy water from clogging the steam valve. This small step leads to fluffier, better-cooked rice.
Q: Can I use the "Rice" button on my Instant Pot for brown rice?
A: No, the "Rice" button is designed for white rice and uses a low-pressure cycle. Brown rice needs the "Manual" or "Pressure Cook" setting on High Pressure, or it will turn out undercooked and hard. Always use the correct setting for whole grains.
Works cited
- Instant Pot Brown Rice Recipe - Love and Lemons, accessed July 4, 2025, https://www.loveandlemons.com/instant-pot-brown-rice/
- Perfect Instant Pot Brown Rice - Eat Yourself Skinny, accessed July 4, 2025, https://www.eatyourselfskinny.com/perfect-instant-pot-brown-rice/
- Perfect Instant Pot Brown Rice | Tested by Amy + Jacky, accessed July 4, 2025, https://www.pressurecookrecipes.com/instant-pot-brown-rice/
- Instant Pot Brown Rice - Kristine's Kitchen, accessed July 4, 2025, https://kristineskitchenblog.com/instant-pot-brown-rice/
- Instant Pot Brown Rice (basic and easy) - RecipeTeacher, accessed July 4, 2025, https://recipeteacher.com/instant-pot-brown-rice-basic-and-easy/
- Instant Pot Brown Rice - Never fix rice the hard way again! - MyWifeCanCook.com, accessed July 4, 2025, https://mywifecancook.com/instant-pot-brown-rice/
- What exactly are the benefits of an Instant Pot over just a normal skillet or slow cooker? Is decreased cook time the big one? : r/instantpot - Reddit, accessed July 4, 2025, https://www.reddit.com/r/instantpot/comments/abk2ur/what_exactly_are_the_benefits_of_an_instant_pot/
- Instant Pot Brown Rice Recipe - The Spruce Eats, accessed July 4, 2025, https://www.thespruceeats.com/instant-pot-brown-rice-recipe-7153409
- Instant Pot Perfect Brown Rice - 4 Varieties - TIDBITS Marci, accessed July 4, 2025, https://tidbits-marci.com/pressure-cooker-brown-rice/
- Perfect Instant Pot Brown Rice - Shane & Simple, accessed July 4, 2025, https://shaneandsimple.com/perfect-instant-pot-brown-rice/
- Instant Pot Brown Rice - One Happy Housewife, accessed July 4, 2025, https://www.onehappyhousewife.com/instant-pot-brown-rice/
- Instant Pot Brown Rice Recipe - Rachel Cooks®, accessed July 4, 2025, https://www.rachelcooks.com/instant-pot-brown-rice/
- Instant Pot Brown Rice – WellPlated.com, accessed July 4, 2025, https://www.wellplated.com/instant-pot-brown-rice/
- Instant Pot Brown Rice Recipe, accessed July 4, 2025, https://www.indianhealthyrecipes.com/instant-pot-brown-rice/
- Instant Pot Rice - Simply Recipes, accessed July 4, 2025, https://www.simplyrecipes.com/recipes/how_to_make_rice_in_the_pressure_cooker/
- Brown rice, any tips and tricks? : r/instantpot - Reddit, accessed July 4, 2025, https://www.reddit.com/r/instantpot/comments/qnxa2v/brown_rice_any_tips_and_tricks/
- How do you take your brown rice to the next level? : r/EatCheapAndHealthy - Reddit, accessed July 4, 2025, https://www.reddit.com/r/EatCheapAndHealthy/comments/7wu889/how_do_you_take_your_brown_rice_to_the_next_level/
- One (instant) pot brown rice meal suggestions? : r/instantpot - Reddit, accessed July 4, 2025, https://www.reddit.com/r/instantpot/comments/163ifda/one_instant_pot_brown_rice_meal_suggestions/
- 72 Tasty Brown Rice Recipes That Keep on Giving - Parade, accessed July 4, 2025, https://parade.com/1353318/felicialim/brown-rice-recipes/
- help with brown rice meals that aren't horrible : r/budgetfood - Reddit, accessed July 4, 2025, https://www.reddit.com/r/budgetfood/comments/ur8tfl/help_with_brown_rice_meals_that_arent_horrible/
- Freezer Friendly Instant Pot Brown Rice - Confessions of a Fit Foodie, accessed July 4, 2025, https://confessionsofafitfoodie.com/freezer-friendly-instant-pot-brown-rice/
- Instant Pot Brown Rice (Perfectly Cooked!) - Detoxinista, accessed July 4, 2025, https://detoxinista.com/instant-pot-brown-rice/
- Instant Pot Brown Rice - How to cook Long Grain Brown Rice perfectly! - Tried Tested and True, accessed July 4, 2025, https://triedtestedandtrue.com/instant-pot-brown-rice/