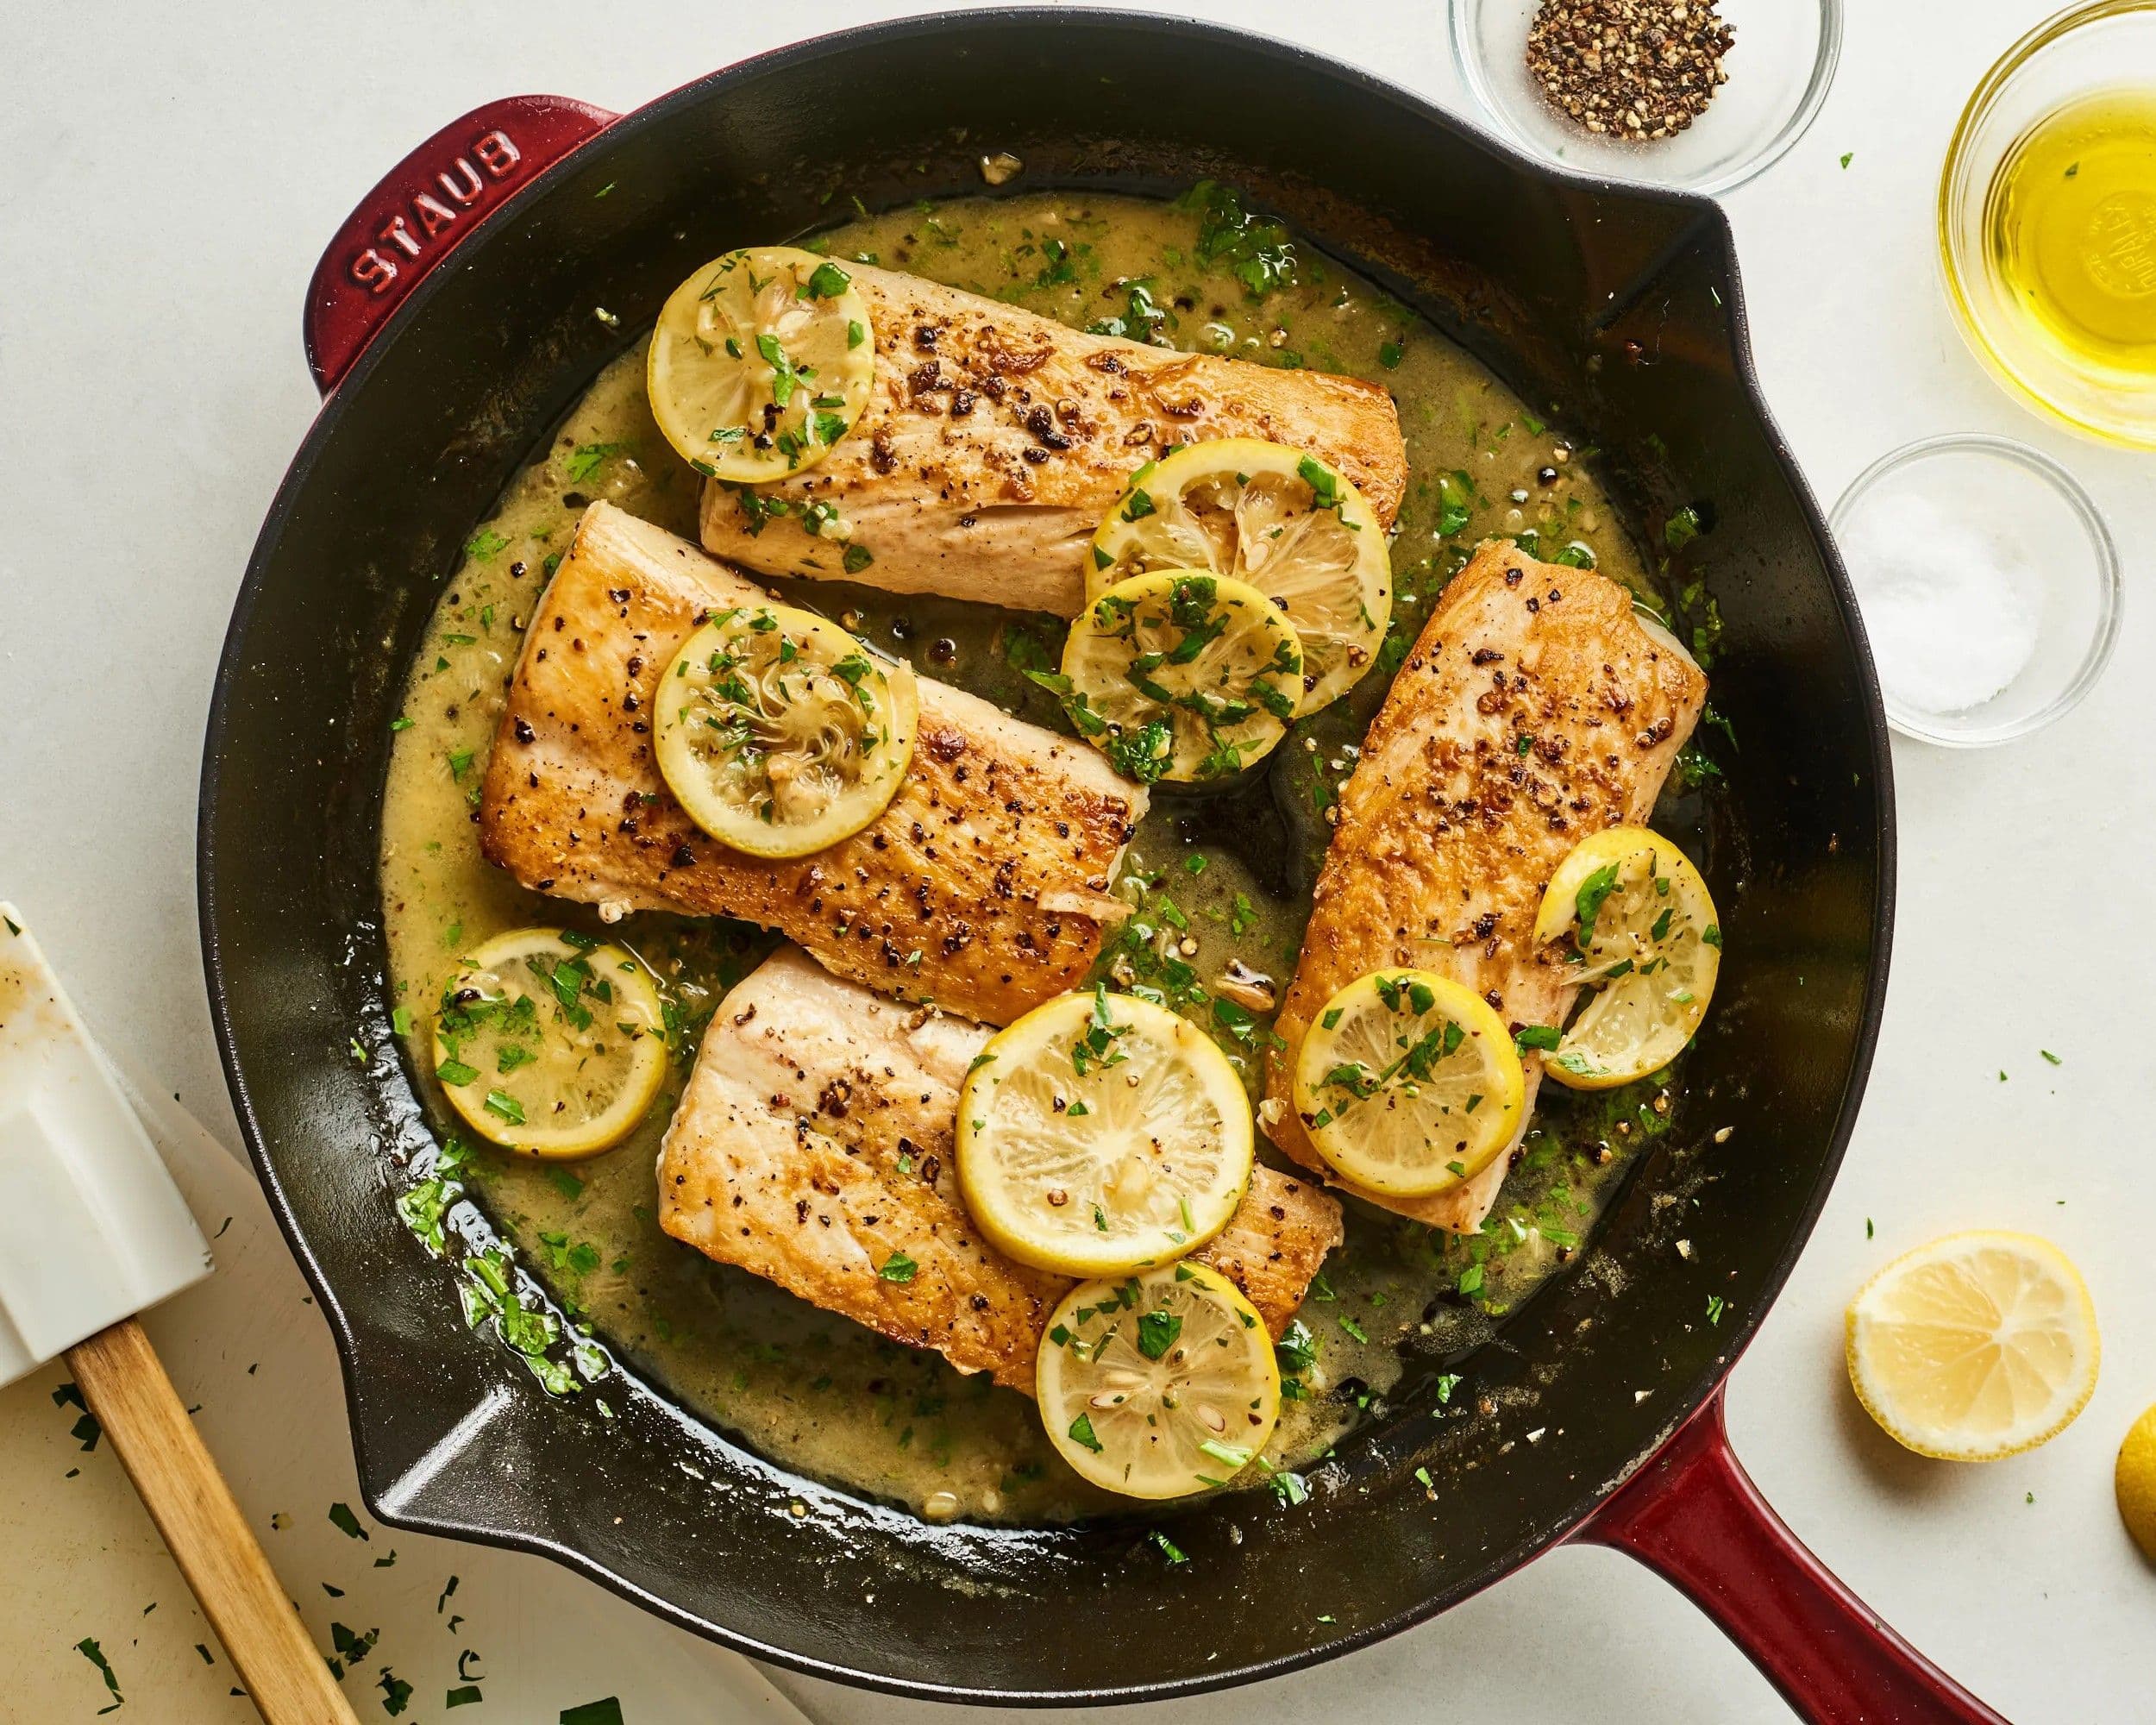
The Guide to Perfect Pan-Seared Mahi Mahi (with Lemon-Garlic Butter Sauce)
Mahi mahi, also known by the beautiful name dorado, is a true gem of the ocean and a fantastic choice for any home cook. It boasts a firm, lean white flesh with a wonderfully mild, slightly sweet flavor. Best of all, it lacks the assertive "fishy" taste that can be a concern for some, making it a guaranteed crowd-pleaser and a perfect gateway fish for those looking to add more seafood to their diet.
In this guide, we’ll walk you through a simple yet elegant recipe for pan-seared mahi mahi, bathed in a luscious lemon-garlic butter sauce that comes together in minutes. This restaurant-quality meal is surprisingly easy to prepare in your own kitchen in under 30 minutes, proving that a sophisticated dinner doesn't have to be complicated or time-consuming.
Why Make This Delicious Recipe & When to Serve It
This pan-seared mahi mahi is the definition of a culinary chameleon, fitting effortlessly into any occasion. It's a true weeknight wonder, transforming a regular Tuesday into a gourmet experience in about 30 minutes, delivering maximum flavor with minimal stress.
Looking to impress your guests? This dish is your secret weapon. The elegant presentation and sophisticated flavor of the lemon-garlic butter sauce make it perfect for a dinner party, a special date night, or a celebratory family meal. It’s a dish that consistently earns rave reviews.
While this recipe focuses on pan-searing, mahi mahi’s firm texture makes it incredibly versatile and ideal for the grill, turning any summer cookout into a tropical feast. Plus, as a lean, high-protein fish, it’s a wonderfully nutritious choice that feels indulgent without compromising on healthy eating goals.

Basic Ingredients (Serves 4)
- 4 (6-ounce) Mahi Mahi Fillets (about 1-inch thick): As a firm, lean, and mildly sweet white fish, mahi mahi is the star. A 1-inch thickness is the sweet spot, allowing you to achieve a perfect, crispy crust on the outside without overcooking the delicate, flaky interior. While fresh is always wonderful, high-quality frozen fillets that have been properly thawed work beautifully in this recipe.
- 2 tablespoons Olive Oil: This oil is specifically for the initial high-heat sear. Its high smoke point is essential for creating a golden-brown crust without burning and imparting any bitter, off-putting flavors to the fish.
- 4 tablespoons Cold Unsalted Butter (cut into 4 pieces): Butter is added after the sear, once the heat is lowered. Its purpose is purely for flavor, lending a rich, nutty taste to the sauce. Using cold butter and adding it piece by piece allows it to melt slowly and emulsify, creating a luxuriously creamy sauce rather than a separated, oily one.
- 1 medium Lemon (for 1 ½ tablespoons juice and 4-5 thin slices): The lemon is a multitasking hero here. The acidity in the juice brightens the final sauce, cuts through the richness of the butter, and chemically neutralizes any trace "fishy" aromas. The thin slices add a beautiful presentation and gently infuse more citrus flavor as the sauce finishes.
- 2 cloves Garlic (minced): Freshly minced garlic provides the essential aromatic and savory backbone of the sauce. It is added at a lower temperature to prevent it from scorching, which would turn its flavor from sweet and fragrant to sharp and bitter.
- 1 ¼ teaspoons Kosher Salt (divided): We recommend kosher salt over table salt because its larger flakes provide a better texture and are easier to control when seasoning. It plays the crucial role of seasoning the fish directly and amplifying every other flavor in the rich butter sauce.
- Freshly Ground Black Pepper: A few grinds of black pepper add a subtle, pungent warmth that provides a beautiful contrast to the rich butter and bright lemon. This simple addition brings a welcome layer of complexity to the overall flavor profile of the dish.
- 1 tablespoon Fresh Parsley (coarsely chopped): Fresh, flat-leaf parsley is stirred in at the very end, once the pan is off the heat. This simple step is vital for preserving the herb's vibrant green color and adding a final burst of clean, fresh, and slightly peppery flavor that lifts and completes the entire dish.

Step-by-Step Preparation
- Prepare the Aromatics and Season the Fish: First, prepare your lemon by slicing half of it into thin rounds and juicing the other half to get about 1 ½ tablespoons of juice; mince your 2 cloves of garlic and set both aside. Pat the four 6-ounce mahi mahi fillets completely dry with paper towels; this is the single most important step for achieving a crispy, golden sear. Season all sides of the fillets with 1 teaspoon of kosher salt and fresh black pepper.
- Sear the First Side Undisturbed: In a large cast-iron or heavy-bottomed skillet, heat 2 tablespoons of olive oil over medium-high heat until it is shimmering and just starts to release the first wisps of smoke. Carefully lay the seasoned fillets in the hot pan, ensuring there is space between them to prevent steaming. Let the fish sear for about 4 minutes without moving it. This undisturbed contact with the hot pan is what creates that coveted, flavorful crust.
- Flip and Finish Cooking: Using a thin fish spatula, flip the fillets. They should release easily; if they stick, give them another 30-60 seconds to finish forming their crust. Cook on the second side for another 2-4 minutes, until the fish is just opaque and flakes easily. For perfect results, use an instant-read thermometer—the internal temperature should be 137°F. Immediately transfer the cooked fish to a serving platter to rest.
- Build the Lemon-Garlic Butter Sauce: Reduce the heat under the skillet to medium-low to prevent the remaining ingredients from burning. Pour in the 1 ½ tablespoons of fresh lemon juice, the minced garlic, and the remaining ¼ teaspoon of kosher salt. Use a wooden spoon to scrape up all the flavorful browned bits (the fond) stuck to the bottom of the pan; this is where a huge amount of flavor is concentrated.
- Emulsify the Butter and Finish: Add the reserved lemon slices to the pan. Now, add the 4 tablespoons of cold, cubed butter, one piece at a time, swirling the pan constantly to encourage it to melt and emulsify. Be patient and wait until each piece is almost fully incorporated before adding the next. This slow process is the key to a creamy, stable sauce. Once all the butter is melted, immediately remove the pan from the heat.
- Garnish and Serve Immediately: Stir the 1 tablespoon of fresh, chopped parsley into the sauce. Adding it off the heat preserves its beautiful green color and fresh, vibrant flavor. Pour this incredible lemon-garlic butter sauce over the pan-seared mahi mahi fillets and serve right away while everything is hot and the textures are at their peak.

Tips for the Perfect Recipe
- Achieve the Perfect Sear
- Start Bone-Dry: Moisture is the number one enemy of a crispy crust. Before seasoning, pat the fillets thoroughly dry with paper towels. This ensures the fish sears rather than steams in the pan.
- Use the Right Pan: A well-seasoned cast-iron skillet or a heavy-bottomed stainless steel pan is your best friend here. These pans retain heat incredibly well, which is essential for an even, deep-brown sear. A good nonstick pan is also a great option, especially for beginners who are concerned about sticking.
- Ensure the Pan is Hot: Wait until the oil is shimmering and almost smoking before adding the fish. Placing the fillets in a properly heated pan allows the crust to form instantly, which not only creates flavor but also prevents the fish from sticking.
- Guarantee Flaky, Moist Fish (Don't Overcook!)
- Trust the Thermometer: The most reliable way to prevent dry, tough fish is to use an instant-read thermometer. Pull the mahi mahi from the skillet when the thickest part registers an internal temperature of 137°F.
- Mind the Carry-Over Cooking: The fish will continue to cook from residual heat even after you remove it from the pan. Pulling it at 137°F allows this "carry-over cooking" to gently raise the temperature to the perfect final point of around 145°F, ensuring it is both perfectly cooked and incredibly moist.
- Visual Cues: If you don't have a thermometer, you can test for doneness by inserting a fork into the thickest part of the fillet and giving it a gentle twist. The fish is ready when the flesh turns from translucent to opaque and flakes apart easily.
- Elevate Your Sauce
- Add Aromatics: For a deeper, more complex flavor, sauté 2-3 tablespoons of finely minced shallots in the pan drippings for a couple of minutes until softened before you add the garlic and lemon juice.
- Deglaze with Wine: To create a truly restaurant-level sauce, pour about ¼ cup of a dry white wine like Pinot Grigio or Sauvignon Blanc into the pan after the shallots. Let it bubble and reduce by half before proceeding with the lemon juice and butter.
- Add a Pinch of Heat: A small pinch of red pepper flakes tossed in with the garlic will give the sauce a subtle, pleasant warmth that beautifully complements the richness of the butter and the brightness of the lemon.

Serving Ideas
- Classic & Starchy Sides
- To Soak Up the Sauce: Don't let a single drop of that liquid gold go to waste. Serve the mahi mahi alongside a bed of fluffy white rice, quinoa, creamy mashed potatoes, or buttery orzo to absorb the delicious sauce.
- Crusty Bread: A few slices of warm, crusty bread are the perfect tool for mopping up every last bit of the lemon-garlic butter sauce directly from your plate.
- Fresh & Vibrant Pairings
- Tropical Salsas: Lean into the fish's tropical origins by topping it with a fresh mango or pineapple salsa. The burst of sweetness and acidity provides a stunning contrast to the savory fish and rich sauce.
- Simple Green Vegetables: A side of simply prepared vegetables like roasted asparagus, steamed green beans, or a crisp green salad with a light vinaigrette adds a fresh, clean element that balances the richness of the meal perfectly.
- Creative Applications
- Elevated Fish Tacos: Flake the cooked mahi mahi into warm corn or flour tortillas. Top with a crunchy cabbage slaw, fresh cilantro, and a drizzle of avocado crema for the best fish tacos you've ever had.
- Healthy Taco Bowls: For a deconstructed and incredibly satisfying meal, serve the flaked fish over a bowl of rice and black beans. Finish with generous spoonfuls of pineapple salsa, avocado, and a tangy lime-yogurt slaw.

Tips for Keeping Mahi Mahi Fresh Longer
Keeping Fresh
- Use Quickly: For the absolute best flavor and texture, plan to cook your fresh, raw mahi mahi within one to two days of purchasing it.
- Keep it Cold: Your refrigerator should be set to 40°F (4°C) or below. Store the fish on the bottom shelf towards the back, as this is typically the coldest part of the fridge.
- The Ice Pack Method: To mimic a professional fishmonger's setup and maximize freshness, place the fillets in a single layer inside a zip-top bag. Press all the air out, seal it, and lay the bag on a tray lined with ice or reusable ice packs. This keeps the fish closer to an ideal 32°F (0°C).
- Keep it Dry and Covered: If the fish isn't already vacuum-sealed, wrap it tightly in plastic wrap or foil. This prevents the dry air of the refrigerator from dehydrating the flesh while also protecting it from absorbing any unwanted odors.
Storing Leftovers
- Refrigerate Promptly: To ensure safety and prevent the growth of bacteria, all leftovers should be refrigerated within two hours of being cooked.
- Use an Airtight Container: Transfer the cooled mahi mahi to a shallow, airtight container before placing it in the fridge. This helps to maintain moisture, keep bacteria out, and prevent fishy odors from permeating other foods.
- Consume Within 3-4 Days: According to food safety guidelines from the USDA, cooked fish and other seafood can be safely stored and enjoyed for up to three to four days when refrigerated properly.
Conclusion
With its firm, sweet flesh and incredible versatility, mahi mahi is a true delight that deserves a spot in your dinner rotation. Paired with a simple yet profoundly flavorful lemon-garlic butter sauce, it transforms into an elegant meal that feels special enough for a celebration but is quick enough for any weeknight. We encourage you to try this recipe and discover just how easy it is to bring this stunning, restaurant-worthy seafood dish to your own table.
Frequently Asked Questions
Q: What does mahi mahi taste like?
A: Mahi mahi has a wonderfully mild and slightly sweet flavor, making it a great choice for those who don't enjoy a strong "fishy" taste. Its texture is distinctly firm, dense, and meaty with large, moist flakes when cooked, often compared favorably to a cross between halibut and swordfish.
Q: Can I use frozen mahi mahi for this recipe?
A: Absolutely! High-quality frozen mahi mahi fillets are an excellent and convenient option. For the best texture, thaw them overnight in the refrigerator. If you're in a hurry, you can place the sealed fillets in a bowl of cold water for 15-30 minutes until thawed.
Q: How do I know when my mahi mahi is cooked perfectly?
A: The most accurate method is to use an instant-read thermometer; pull the fish from the heat when it reaches 137°F to account for carry-over cooking. Without one, the fish is done when its flesh has changed from translucent to opaque and it flakes easily when gently prodded with a fork.
Q: Besides pan-searing, what's another easy way to cook mahi mahi?
A: Baking is a fantastic and nearly foolproof alternative that's perfect for beginners. Simply place your seasoned fillets on a baking sheet, top with a pat of butter and lemon slices, and bake at 400°F for about 10-15 minutes, depending on thickness, for an incredibly easy and delicious meal.