The Best No-Bake Peanut butter Pie
There are few desserts that evoke the same level of pure, unadulterated comfort as a slice of peanut butter pie. It’s a timeless American classic, a dessert that feels both nostalgic and utterly decadent. With its cloud-like, creamy filling and rich, satisfying flavor, this pie is the culinary equivalent of a warm hug—a perfect treat that promises to delight with every single bite.
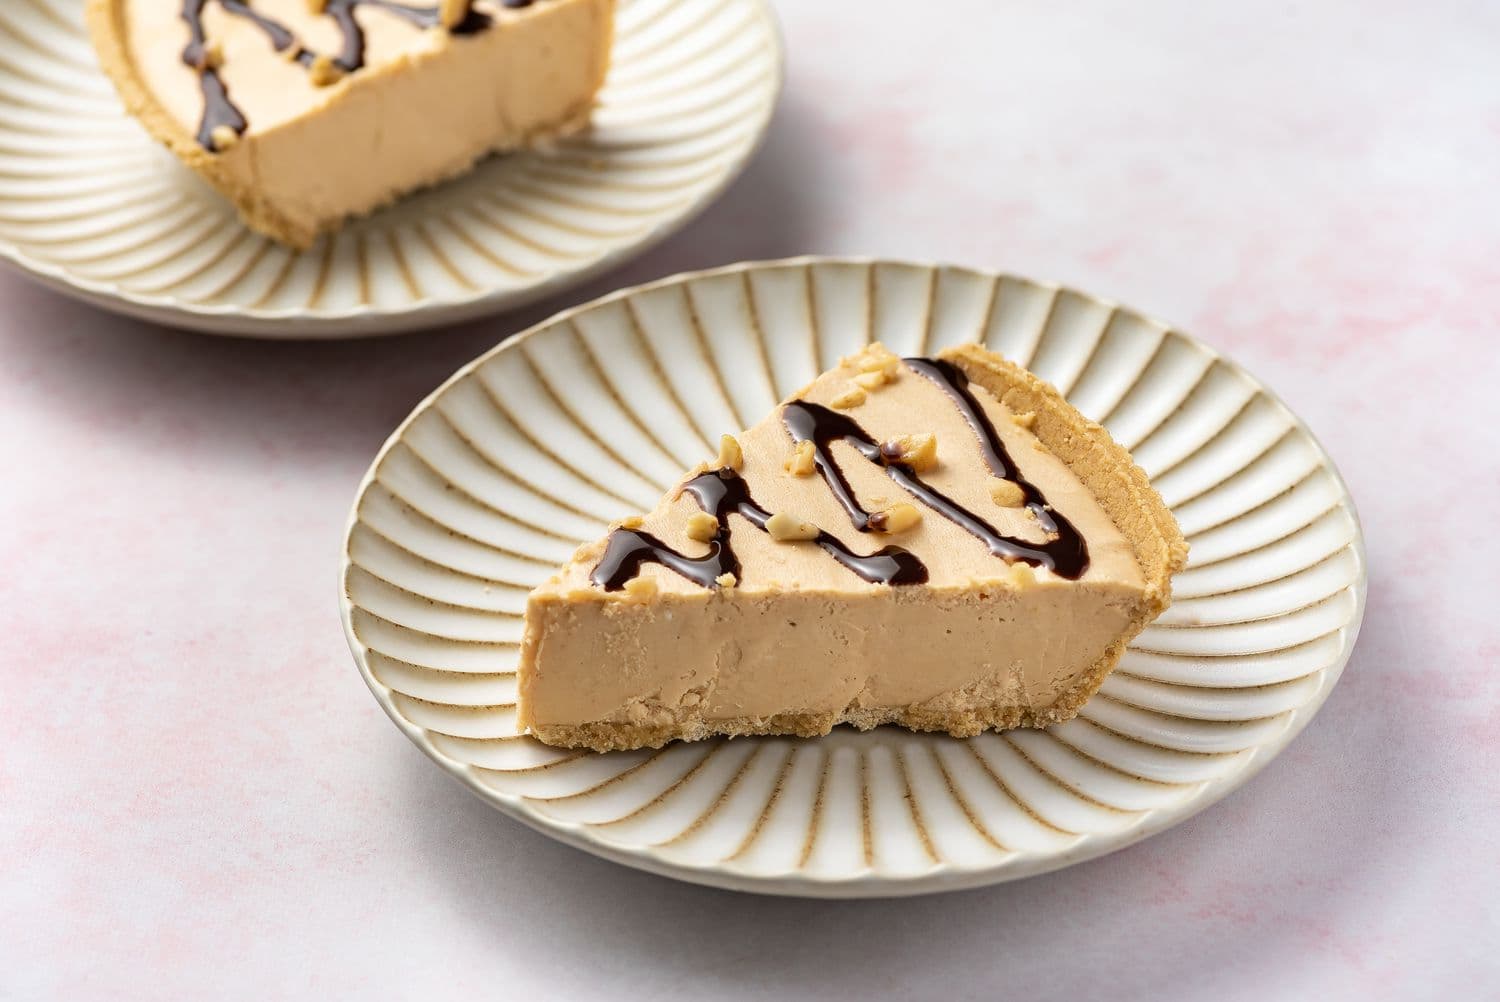
This recipe is designed to be your go-to for the perfect peanut butter pie experience. We’ve paired a ridiculously easy, no-bake peanut butter mousse filling with a crunchy, chocolatey Oreo cookie crust. The result is a show-stopping dessert that requires minimal effort but delivers maximum flavor, making it an absolute must-have in any home baker’s repertoire.
Why Make This Delicious Dessert & When to Serve It
If you’re a fan of the classic chocolate and peanut butter combination, this pie is your dream come true. It’s incredibly simple to prepare, relying on a handful of basic ingredients and a no-fuss method that guarantees a perfect result every time. It’s the kind of dessert that looks impressive enough for a special occasion but is easy enough to whip up just because.
This pie’s versatility makes it a star for any event. It’s a guaranteed hit at holiday dinners, especially Thanksgiving, and is always the first dessert to disappear at a potluck or family gathering. Celebrate a birthday with it, bring it to a summer barbecue, or simply make it for a cozy weekend at home. There’s never a wrong time for peanut butter pie.

Basic Ingredients (Serves 8-10 people)
- 24 whole Oreo cookies: These form the rich, chocolatey foundation of our crust. Using the entire cookie, filling included, adds extra sweetness and helps the crumbs bind together perfectly for a no-bake base.
- 5 tablespoons unsalted butter, melted: This is the essential binding agent for our cookie crumbs. Once chilled, the butter solidifies, creating a crust that is firm enough to slice cleanly but still has a delightful crumbly texture.
- 1 (8-ounce) package cream cheese, softened to room temperature: A non-negotiable ingredient for modern peanut butter pie, cream cheese provides a subtle tang that cuts through the richness and gives the filling a luxurious, cheesecake-like structure.
- 1 cup confectioners' (powdered) sugar: This is our sweetener of choice because it dissolves effortlessly into the filling, ensuring a silky-smooth, non-gritty texture. It provides a balanced sweetness that complements the peanut butter perfectly.
- 1 cup creamy, shelf-stable peanut butter: As the star of the show, the type of peanut butter matters. A commercial, no-stir brand is crucial for achieving a smooth, homogenous filling that won’t separate or become oily.
- 1 teaspoon vanilla extract: While it plays a background role, vanilla extract is key to elevating the dessert. It deepens and rounds out the other flavors, adding a touch of aromatic warmth to the filling.
- 1 (8-ounce) container frozen whipped topping (like Cool Whip), thawed: This is our secret weapon for a foolproof filling. It creates a light, airy mousse texture and contains stabilizers that ensure your pie sets up perfectly and holds its shape beautifully.

Step-by-Step Preparation
1. Prepare the Oreo Crust
In a food processor, pulse the 24 whole Oreo cookies until they form fine, even crumbs. Pour in the 5 tablespoons of melted butter and pulse again until the mixture is well combined and resembles wet sand. Firmly press this mixture into the bottom and up the sides of a 9-inch pie plate, using the flat bottom of a drinking glass to create a tight, even crust. Place the crust in the freezer for at least 20 minutes to set while you prepare the filling.
2. Create the Smooth Filling Base
In a large mixing bowl, combine the 8 ounces of softened cream cheese and 1 cup of confectioners' sugar. Using an electric mixer on medium speed, beat the ingredients until they are completely smooth and creamy, with no lumps remaining. Scrape down the sides and bottom of the bowl with a spatula to ensure everything is incorporated.
3. Incorporate the Peanut Butter
Add the 1 cup of creamy peanut butter and 1 teaspoon of vanilla extract to the cream cheese mixture. Continue to beat on medium speed until all the ingredients are fully blended and the filling is uniform and smooth. The mixture will be thick and luscious at this point, so scrape the bowl again to ensure no pockets of cream cheese are left behind.
4. Fold in the Whipped Topping
Switch to a rubber spatula and gently fold the 8-ounce container of thawed whipped topping into the peanut butter base. To maintain a light and airy texture, add the whipped topping in three parts, folding gently until just combined after each addition. Be careful not to stir vigorously or overmix, as this will deflate the filling.
5. Fill and Chill the Pie
Spoon the finished peanut butter filling into the chilled Oreo crust and use your spatula to spread it into an even, smooth layer. Cover the pie loosely with plastic wrap and place it in the refrigerator to chill for at least 6 hours, or preferably overnight. This crucial chilling time allows the filling to set into a firm yet creamy, mousse-like consistency that is perfect for slicing.

Tips for the Perfect Dessert
- Start with Softened Cream Cheese: For the smoothest possible filling, make sure your cream cheese is truly at room temperature. This is the most important step for preventing lumps and achieving that signature velvety texture that makes the pie so irresistible.
- Use Commercial Peanut Butter: For this no-bake recipe, it's best to avoid natural peanut butter that requires stirring. A shelf-stable, commercial brand contains stabilizers that are essential for a silky, non-grainy filling that won't become oily or separate after chilling.
- Don't Skimp on Chilling Time: Patience is key! The pie needs a minimum of 6 hours in the refrigerator for the filling to firm up properly. This ensures that you can cut clean, beautiful slices that hold their shape perfectly on the plate.
- Experiment with the Crust: While the Oreo crust offers a decadent, candy-bar-like flavor, feel free to get creative. A classic graham cracker crust will give the pie a more traditional, nostalgic taste, while a Nutter Butter crust will double down on the intense peanut flavor.

Serving Ideas
- The Classic Trio: For a truly show-stopping presentation, top each slice with a generous dollop of fresh whipped cream, a drizzle of rich chocolate sauce, and a sprinkle of chopped Reese's Peanut Butter Cups.
- Salty & Sweet Harmony: To balance the pie's sweetness and add a sophisticated touch, finish each slice with a light sprinkle of flaky sea salt. The salt enhances the peanut butter flavor and adds a delightful textural contrast.
- A Nod to PB&J: For a fun and nostalgic twist, serve slices with a side of raspberry sauce for dipping. You can also swirl a few tablespoons of your favorite raspberry jam over the top of the pie before the final chill.
- Serve it Frozen: On a hot day, this pie is incredible when served directly from the freezer. It takes on a firm, ice-cream-like texture. Just let it sit at room temperature for about 10-15 minutes before slicing to make it easier to cut.

Tips for Storing and Serving
Storing Leftovers
- In the Refrigerator: Tightly cover any leftover pie with plastic wrap or store it in an airtight container. It will remain fresh and delicious in the refrigerator for up to 5 days.
- In the Freezer: This pie freezes beautifully. For best results, freeze it without any toppings. Wrap the pie securely in a layer of plastic wrap, followed by a layer of aluminum foil, to protect it from freezer burn. It can be stored for up to 3 months.
Serving Tips
- Thawing from Frozen: When you're ready to enjoy your frozen pie, transfer it to the refrigerator to thaw overnight. This slow, gentle thawing process prevents condensation from forming and helps the crust maintain its perfect texture.
- Serve Chilled: Because the filling contains dairy products like cream cheese and whipped topping, this pie should not be left at room temperature for more than two hours. Always serve it cold, directly from the refrigerator or freezer, for the best taste and texture.
Conclusion
With its rich flavor, dreamy texture, and effortless preparation, this no-bake peanut butter pie is destined to become a family favorite. It’s a dessert that celebrates simplicity while delivering a truly decadent experience. So go ahead, give this recipe a try, and get ready to fall in love with the perfect slice of peanut butter heaven.
Frequently Asked Questions
Q: Can I use natural peanut butter for this recipe?
A: It is highly recommended to use a commercial, no-stir creamy peanut butter. Natural varieties tend to separate, which can result in a grainy or oily filling, whereas stabilized peanut butter ensures a perfectly smooth and creamy texture.
Q: Can I use real whipped cream instead of Cool Whip?
A: Yes, you can substitute 1.5 cups of homemade sweetened whipped cream. However, the pie will be less stable and may not set as firmly, as Cool Whip contains stabilizers that help the filling hold its shape beautifully.
Q: Can I make this pie ahead of time?
A: Absolutely, this dessert is perfect for making ahead. You can prepare it up to two days in advance and keep it covered in the refrigerator, or freeze it (ungarnished) for up to three months for a stress-free option.
Q: How can I make this peanut butter pie gluten-free?
A: The filling itself is naturally gluten-free, so making the pie gluten-free is simple. Just substitute the regular Oreos with your favorite brand of certified gluten-free chocolate sandwich cookies for the crust.